Monday, February 25, 2013

Random recipe #25: Bermuda Salad

I felt very old last week. First, I saw a group of new university students moving into their hostel accommodation and realised I looked like one of their mothers. Second, I got out of bed and put my neck out. Third, I saw several copies of Mollie Katzen's Moosewood Cookbook in charity shops.

She was more hippy than hipster, but Mollie Katzen ruled the vegetarian school of eating in the late 1970s and 80s. She was part of a collective (it was the 70s, remember?) who ran a restaurant in Ithaca, New York devoted to good, wholesome food. The hand-lettered Moosewood Cookbook, first published in 1973, reflected that ethos (instead of a table of contents it has a 'table of contentment') and went on to become one of the 10 best-selling cookbooks of all time, according to the New York Times. The food, though a little dated in parts, is not unlike that in Ottolenghi's Plenty, so if you see a copy in a charity shop, snap it up.


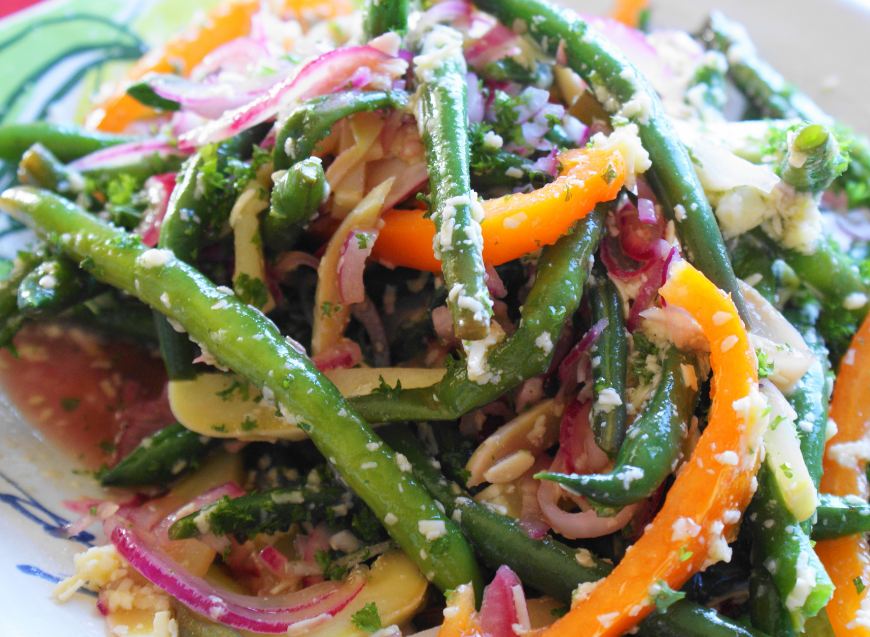
Moosewood Bermuda Salad
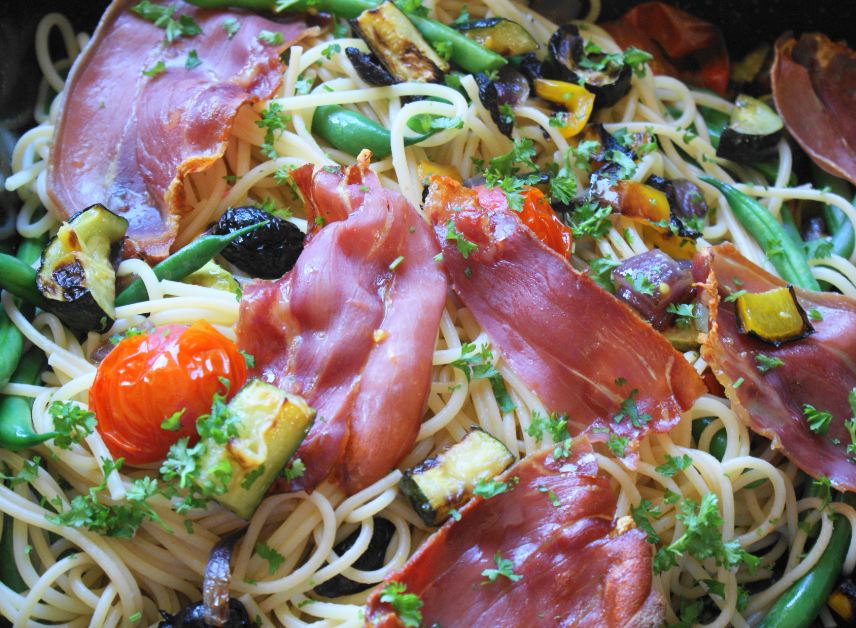
All that said, I felt a bit nervous when my hand fell on the book's cracked spine when I was searching for a contender for February's Random Recipe challenge. I thought of some of the book's less appealing recipes, like Stuffed Cabbage or White Rabbit Salad (cottage cheese, apples, seeds) and wondered how I would sell those to my dining companions. In the end though, the benign gods of Random Recipes - or at least the beatific Dom of Belleau Kitchen - smiled upon me and we ended up with this gem. It looks a bit messy, but it tastes delicious. Don't tell Mollie's crew but we ate it with a roast chicken and it was a very happy match.

125ml apple cider vinegar
1/2 tsp salt
lots of freshly ground black pepper
2 cloves of garlic, crushed
125ml extra virgin olive oil
500g green beans, topped and tailed
2 red onions, thinly sliced
1 cup grated cheese
two handfuls fresh parsley, finely chopped

Put the vinegar, salt and pepper and garlic in a large bowl (the serving bowl, to cut down on dishes) and stir well. Whisk in the olive oil. Add the sliced onion and set aside.
Steam the beans until just tender. Drain, then add to the marinade. Stir well and let cool, then cover and refrigerate for at least three hours before serving.
Ten minutes before you're ready to eat, take the salad out of the fridge. Toss through the parsley and grated cheese just before serving. Serves four.

The instructions in the book are very explicit: "This is a COLOR SALAD. Don't substitute white onions or cheese or you'll lose the scheme. Okay?" You're also supposed to serve it on a bed of red cabbage leaves for added wow factor. I didn't. As for the cheese, the book specifies colby (ugh!) but we used tasty cheddar. Feta or Parmesan would be good too. The final instruction is to "Garnish Lavishly" with eggs, tomatoes, olives, sprouts, lemon slices or orange slices. You can take a book out of the 1970s, but you can't take the 1970s out of the book.

Do you have the Moosewood Cookbook? Do you still use it?

Friday, February 22, 2013

Treat me: Chocolate ginger lychees

When I was about 11 or 12 one of my favourite cookbooks was The Australian Women's Weekly Chinese Cooking Cookbook. I don't ever remember my mother cooking anything out of it, but we did eat out at Chinese restaurants and I based my whole understanding of the menu at Chopsticks and Hoo Wah on what was on offer in that book.
It was probably quite sophisticated for the time and it had all the information I craved on how to make curly spring onions and deep-fried ice-cream balls. None of which I can remember now, of course, but one image from the book has stayed with me. The star of the dessert section, apart from the aforementioned deep-fried ice-cream, was the chocolate-dipped lychees. Some 25 years later, I have finally made them. And boy, were they worth the wait.


Chocolate ginger lychees
These couldn't be simpler - or more delicious. The only thing you need to be careful about is draining the lychees really well. Handle them with care - dry them with kitchen paper like you're handling a baby after a bath - and you're away. Quantities are slightly approximate because some tins of lychees contain more than others. I'm sure you won't be too stuck for ideas if you're left with lychees, ginger or chocolate left over.
As well as being the ultimate trip down memory lane for me, this recipe is also perfect for this month's We Should Cocoa challenge. The February We Should Cocoa is being hosted by Jen of Blue Kitchen Bakes, who has chosen ginger as the special guest ingredient.

1 x 450g tin lychees in light syrup
20 small nuggets of crystallised ginger
200g good quality dark chocolate, at least 60 per cent cocoa solids

Drain the lychees in a sieve, then dry carefully with kitchen paper. Leave them upside down on more kitchen paper to dry out while you melt the chocolate.
Melt the chocolate over gentle heat - in a double boiler arrangement is probably safest. Line a tray with baking paper.
Insert a piece of ginger into each lychee. Using a fork, a skewer or a dipping spoon, carefully drop each stuffed lychee into the chocolate and roll it around to coat. Remove from the chocolate and place on the lined tray. Repeat until all the lychees are coated.
Put the dipped lychees in the fridge to set firm, then transfer to a lidded container. Store in the fridge. They're also good straight from the freezer - it's like having a chocolate-ginger-lychee sorbet. Makes about 18.

Have a great weekend, everyone x


Wednesday, February 20, 2013

Calamari panzanella

One of the Small Girl's favourite things is the Colossal Squid at Te Papa. Have you seen it? It's the only colossal squid specimen on display in the world and once you've gazed at all 495kg of it in the tank you can watch the strangely compelling video footage of it being caught, then transferred to the museum. There's a 3D movie as well, but I've never managed to watch it because "no Mummy, it's too scary". One day, I'm going to go to Te Papa by myself and watch the whole thing.

Anyway, we talk about colossal squids a lot at our place. A couple of weeks ago I bought some baby octopus to sizzle on the barbecue and watching them wriggle around on the hotplate was so disturbing that it nearly put me off eating them. Thankfully, scored squid tubes don't look nearly as lively during the cooking process and they taste just as good.


Calamari Panzanella
Apart from being so good to eat, squid is incredibly cheap. Make sure the ones you are buying have come from waters close by - the frozen Chinese stuff for sale in most New Zealand supermarkets isn't fit for bait.
This started out as a classic squid and chorizo salad but soon morphed into something else. It's not really panzanella, but it's not far off.

400g squid tubes
200g chorizo sausage, sliced into coins
2 cloves garlic, finely sliced
2 red peppers, sliced
a punnet of cherry tomatoes, halved
lots of fresh parsley, finely chopped
4-5 slices of good, rustic bread (slightly stale is ok), cut into 2cm cubes
olive oil
2 Tbsp soy sauce
2 Tbsp red wine vinegar

Heat the oven to 200C. Toss the cubed bread with a couple of tablespoons of olive oil and put in a roasting dish. Bake for 15 minutes, stirring occasionally, until golden. Set aside.
Rinse the squid tubes, then dry with kitchen paper and lie on a board. Cut each one open so it lies flat, then score carefully with a sharp knife in a criss-cross pattern. Cut into 2cm x 5cm strips, then put in a bowl with the soy sauce, garlic, 2 Tbsp of olive oil, and some salt and pepper. Set aside.
Toss the toasted bread, tomatoes, peppers and parsley together in a serving dish.
Heat the barbecue or a large frying pan and fry the chorizo for a few minutes, until it is crisp. Scatter over the tomatoes and bread. Fry the squid for about 2 minutes, over very high heat, until it is opaque and curled up. Toss it through the tomato, chorizo and bread, then drizzle over the red wine vinegar and a little olive oil.
Serves four as a main course.

Monday, February 18, 2013

Sophie's sort-of Sicilian spaghetti

At the moment I'm deeply involved in The Leopard, the famous Italian novel that charts the decline of a noble Silician family during the late 19th century. At a really basic level it's a bit like a (less violent) version of The Godfather, or The Sopranos. Maybe all life is like that. Anyway, apart from the epic themes of struggle and change and death there are some great descriptions of feasts eaten and given. It's one of those books where you know it's all going to end in tears, but you're compelled to keep reading. I highly recommend it.


Sicilian spaghetti
I made this on Friday night, having opened the pantry and fridge and thought: 'I only went shopping yesterday, why is there nothing to eat?' It's a really good storecupboard sort of dinner and is child-friendly too, especially if your child has a thing for dried fruit, tuna and nuts. I watched Sophie Grigson make it on TV once, about 15 years ago, and I've been making it ever since even though I've long since lost the notes I made of whatever quantities she used. This is how I made it on Friday night and it was a huge success.

1 red onion, finely chopped
3 Tbsp red wine vinegar
1 x 180g tin of good quality tuna in olive oil
two handfuls of raisins or currants
two handfuls of pine nuts, toasted (I use roughly chopped toasted almonds instead, or sunflower seeds if we are especially poor)
1 cup black olives, stoned
a generous amount of fresh parsley, finely chopped
extra virgin olive oil
enough spaghetti for three people - for us that's about 250-300g)

Put the onion and red wine vinegar in a small bowl and leave to steep while you get on with organising everything else. Put the water on to boil for the pasta, and add everything except the spaghetti to the onion mixture. Toss together, add a slosh of olive oil and season to taste.
Cook the spaghetti until it is al dente and drain, then toss it through the sauce. Take a block of Parmesan to the table and let diners add it as they wish. Threaten any non-eaters with a horse's head in their bed. Serves three.

Thursday, February 14, 2013

Sweet hearts for your Valentine

It's not very cool to like Valentine's Day, is it? It's much more acceptable to frown on the ridiculousness of red roses, pink champagne and boxes of chocolates than to admit that you'd happily have any of them turn up at your doorstep.

Speaking as someone who once received a plastic rose for Valentine's Day, I have a foot in both camps. Yes, I believe romantic gestures - however you define them - shouldn't be limited to one day a year, but I don't think that means you should be all Grinch-y about it. Embrace the chance to do something pink and heart-shaped for once. You can always be boring and unromantic tomorrow.


Love Biscuits
The Small Girl and I made these this morning. The recipe is a more straightforward version of Nigella's one in How To Eat.We were going to turn them into bunting for when our beloved comes home, but we've eaten too many and the holes I made got a bit sticky with icing. Nevermind, love is never having to apologise for not making heart biscuits into bunting.

300g plain flour
1 tsp baking powder
1 tsp cinnamon
1 tsp ground ginger
pinch of salt
100g butter, diced
100g soft brown sugar
5 Tbsp golden syrup
1 egg

Heat the oven to 160C and line a tray with baking paper.
Sift the flour, spices, baking powder and salt into a bowl. Rub in the butter (you can do this in a freestanding mixer), then add the sugar. Mix the egg and golden syrup together, then add. Mix with your hands to make a firm dough.
Split it into two discs, wrap one well in clingfilm and put it in the fridge (or wrap it really well and put it in the freezer for up to a month). Roll the other one out between two sheets of clingfilm until it is about 3mm thick and cut out shapes with biscuit cutters.
Place these on the prepared tray and bake for about 12 minutes. Remove to a rack to cool.
When they are cold, ice with glace icing made by mixing 150g icing sugar with 2 Tbsp boiling water and as much food colouring as you can stand. If you fancy something a little harder, check out our MAC makeup-inspired heart below.


May you have a very happy Valentine's Day and be feted by admirers both well-known and secret,
Lucy x

Wednesday, February 13, 2013

Finsbury Park pasta and proscuitto

I invented this quick, delicious spaghetti when we were living in our first London flat. It was a neat place (if you ignored the crack house two doors down, the overland train out the back windows and the bus route out the front) and we had lots of visitors. Now we live in a house in Wellington that's probably three times as big, with neighbours who play classical guitar and invite us over for dinner, with trees and sky out the windows. We still get lots of visitors, though they don't look as frightened when they appear at the door.


Spaghetti with roasted vegetables and proscuitto
This is a very vague recipe that can be altered to fit whatever vegetables you have lying around. In Finsbury Park I relied on whatever looked best at the 24-hour 'Local English Mediterranean Superstore' on Seven Sisters Rd, though I was careful not to buy any of the vegetables that had been sitting out in the traffic fumes all day.

For four people:
A slosh of olive oil
2 red onions, chopped
3 zucchini, sliced into coins
3 cloves garlic, sliced
2 peppers, cut into large dice
2 handfuls of green beans or broccoli, in bite-size pieces
1 cup black olives, stoned
1 punnet cherry tomatoes
1 packet proscuitto
Parmesan and fresh parsley, to serve
500g good quality spaghetti

Heat the oven to 220C. Put the onions, zucchini, garlic, peppers and beans/broccoli in a roasting dish and toss through the oil. Roast for 20 minutes, until they start to turn golden. Stir, then tip in the olives and tomatoes. Lay the proscuitto over the top. Return to the oven for another 5-10 minutes, until the tomatoes are at bursting point and the proscuitto is crisp.
While this is happening, cook the spaghetti in plenty of boiling salted water until al dente. Drain, then toss through the roasted vegetables. Divide between four bowls and top each one with the shards of proscuitto, grated Parmesan and finely chopped parsley.

Monday, February 11, 2013

Pancakes, 1970s style

Given that it's Shrove Tuesday tomorrow, I thought it was about time I showed you a pancake-related relic from my childhood....

No, that's not me, though I did think the woman in the foreground was very glamorous. It's a shot from the box of the Monier Crepe Maker, straight out of the 1970s.


I don't recall my parents hosting huge crepe-related soirees, though I do remember Mum using it occasionally (and letting me use it, when I was deemed responsible enough. I definitely remember reading the accompanying recipe booklet and wishing we could have Crepes Suzette. I was less keen on some of the other suggestions, such as 'moistening a little corned beef with milk, then wrapping it in a crepe'.
It might seem a ridiculous, mono-use tool, but after trying it out yesterday I can confirm that it really does work just as easily as the box claims it will. Not bad for something that must be at least 35 years old (according to this Sydney Morning Herald advertisement). I've never been particularly good at making light, lacy crepes, but switching on the Monier yesterday gave me new confidence. Maybe it was the recipe on the box.

Monier Crepes
All batters are better after a resting period, but this one was good to go after 10 minutes. I've yet to try it out in a normal pan, but I'm sure it would still be fine, you just won't look as cool as I do when you make them.

3 eggs
1 cup flour
pinch of salt
2 Tbsp butter, melted
1 cup milk

Whisk the eggs and flour together, then slowly add the milk and melted butter until you have a smooth batter. Rest in the fridge for at least 10 minutes before using. Makes about a dozen crepes.

Is there a Monier Crepe Maker in your past? What's the secret to your best pancakes?


Friday, February 08, 2013

Treat me: Lemon meringue ice cream

I don't know what is wrong with me but all of a sudden I have become the world's worst maker of meringues.
I've made two batches now that have gone from fluffy peaks of snow-white mixture to dull beige piles and I've lost my nerve completely.
It might be my oven, which doesn't do low temperatures very well (surprising, given that the door has taken to falling open of its own accord). Anyway, the good thing about this is that I've worked out a really good way to use up my meringue disasters.


Lemon meringue ice cream
Don't worry - you don't need to go through the trauma of making a deliberately bad batch of meringues to make this ice cream. In fact, you don't need to make them at all. But you do need meringues of some sort (I won't judge you if you buy them) to fold through this tart, marmalade-streaked frozen wonder.

110g icing sugar
140ml (1/2 a cup plus 1 Tbsp) lemon juice
300ml cream
1/3 cup good lemon curd or marmalade
6-8 meringues, crumbled

Put the lemon juice and icing sugar in a large bowl and stir to dissolve the sugar. Add the cream and whisk until it forms soft peaks. Fold in the marmalade or lemon curd and crumbled meringues.
Pour into a lidded plastic container and freeze for at least four hours. Let soften for five minutes out of the fridge before serving.
If you want to be really fancy, pour the ice cream into a loaf tin lined with cling film. Top with a layer of marmalade or lemon curd, then a layer of meringues (obviously, you'll need more of both if you're doing it this way). Cover loosely with plastic and freeze as above. To serve, lift the whole contraption out of the loaf tin, whisk away the plastic wrap, and transfer to a serving platter.

Have a great weekend, everyone. If you have a fail-safe meringue recipe, especially one designed for temperamental ovens, I'd love to see it...

Wednesday, February 06, 2013

Grapefruit curd

You know how lemon curd is always so painstaking to make, with all that double-boiler anxiety and fretful stirring? It doesn't have to be that way.
I had an epiphany in the weekend after coming across Stephanie Alexander's revolutionary method. As so often happens with The Cook's Companion, I was looking up something else when I stumbled across her lemon curd recipe. In it, she dismisses the received wisdom that it needs gentle heat and patience and instead gives some short-cut instructions.

I was a bit nervous - it's a bit like setting out on a half-marathon to have some geezer pop out from behind a bush and say, 'look love, here's a short-cut that will get you there in half the time' - but I can confidently report that it works a treat. I'll possibly never remember what I was looking for to start with, but with this kind of knowledge now under my belt I'm not too bothered.

Easy Way To Make Grapefruit Curd

Grapefruit Curd
Did you know that if you Google 'grapefruit' most links are for the 'Grapefruit Diet'. I find this profoundly depressing. Instead, I'm prescribing a course of the Grapefruit Curd Diet. Try some of this on your toast and see if you don't feel better about life. Don't worry about the butter and eggs, think of the vitamin C! The recipe is adapted from the one mentioned above in The Cook's Companion, one of my most used, most loved books.

4 free-range egg yolks
2/3 cup caster sugar
100ml freshly squeezed grapefruit juice (one or two grapefruits should do it)
finely grated zest of two grapefruits
60g butter, diced

Put the egg yolks and sugar in a small pot and beat together until well blended. Add the grapefruit juice and zest, and the butter. Put the pot over medium-high heat and stir constantly until it comes to simmering point. As soon as the bubbles appear, remove from the heat. Keep stirring for another minute or so, then pour into sterilised jars. Makes about 450ml. Refrigerate when cold.

Now, I know you're thinking, 'but what will I do with four egg whites'? I have the perfect answer for you, but you'll have to wait until Friday. Put them in a plastic lidded container and freeze them while you await further instructions.

Happy Waitangi Day to fellow New Zealanders everywhere. Hope you are celebrating with some appropriate feasting, whether it's pipis and paua, asparagus rolls and whitebait fritters, roast lamb or a hangi. Cheers!


Monday, February 04, 2013

Barbecue flatbreads

This summer, more than any in recent memory, has been the summer of the barbecue. We've been firing it up at least two or three times a week since early December and it has to be our most-used cooking implement of 2013 so far. I'm sure there's a moral in that somewhere, because it's not in the least bit fancy. It was a wedding present, which makes it nine years old on Wednesday, and it's about as basic as you can get. It's also gas-fired, which lacks the romance of charcoal but has the advantage of being far easier to light.


Barbecue flatbreads
These involve a bit more effort than non-yeasted flatbreads, but not much. They're also nicer to eat and somehow seem a bit more substantial (which is quite handy if all of a sudden you end up feeding more people than you anticipated). I sometimes substitute 100g of the white flour for wholemeal, and use chilli oil instead of ordinary EVOO. Garlic oil would be great too. Little helpers enjoy 'having a turn' at rolling them out.


500g strong white bread flour
1 1/2 tsp dried yeast
1 1/2 tsp salt
330 ml tepid water
3 Tbsp (45ml) olive oil

Put the flour and yeast in a large bowl and stir well, then add the salt and stir again. Make a well in the middle and pour in the oil and water. Mix well to form a rough dough, then cover the bowl with a teatowel and leave for 10 minutes. 
Rub a little oil on the work surface, then tip the dough on top of it. Stretch and fold the dough in on itself about five times (as shown here), then leave for 10 minutes. Repeat this process three more times, then gather the dough into a ball and put into a large, well-oiled bowl. Cover with plastic and leave to rise until doubled - about an hour.
When the dough has risen, turn it out onto a floured surface. Press it out into a rough rectangle, then roll this into a sausage. Cut it into eight pieces.
Roll these out gently into rounds about 1cm thick (mine always end up a bit more free-form), then place on a floured tray. Cover with a cloth and let rise for 10 minutes, then take the tray out to the barbecue and cook the flatbreads on the hot plate for about two to three minutes each side. These are best eaten immediately, but you can reheat them reasonably successfully the next day (even in the toaster).


Have you been having a barbecue summer? What have you been cooking?

Saturday, February 02, 2013

Treat me: Instant biscuits

I won't bore you with the details but I have felt very addled this week. Maybe it's been the heat. Maybe it's because in the last few days our household was knocked sideways by sickness: one of us was sick, one of us was sick of work and one of us was sick of doing everything. Harrumph.
Anyway, I started making some biscuits one night and accidentally over-softened the butter to the point where it turned to a golden pool in the bottom of the bowl, a bit like the tiger in Little Black Sambo. Furious with myself, I decided to proceed anyway and cheered myself up immensely by realising that it is entirely possible to make really, really good cookies really quickly this way. Result!

Fast Cookies - Egg Free

Instant Cookies
The curious thing about these biscuits is that although they are extremely quick to make, they disappear almost as fast. Why is that, do you think? Use whatever dried fruit combination you have to hand, though I must recommend glace cherries for that retro touch. I'm now wondering if you could speed up the process even further and use oil instead of butter... does someone want to try it out for me?

150g butter
3/4 cup lightly packed brown sugar
1 1/4 cups flour
1 1/4 tsp baking powder
1/4 tsp salt
1/4 cup almonds, roughly chopped
1/2 cup glace cherries, halved (or quartered, if they are especially plump)
1/2 cup dried apricots, diced
1/4 cup mixed peel
finely grated zest of one lemon

Heat the oven to 180C. Line two baking trays with baking paper.
Melt the butter in a large pot. Add the sugar and remove from the heat.
Sift the flour, baking powder and salt into the butter mixture and stir well, then add the nuts, fruit and lemon zest.
Roll tablespoons of the mixture into balls and place on the prepared baking trays, leaving a little room for spreading.
Bake for 15-18 minutes, until golden. Leave on the trays to cool for five minutes, then remove to a rack to cool completely. Store in an airtight container when cold. Makes about 18.

Have a great weekend, everyone x