Showing posts with label We Should Cocoa. Show all posts

Friday, June 12, 2015

Chocolate cakes with citrus cheesecake centres

Cupcakes - so 2007, right? Depends who you ask. Personally, I've made about 50 in the last month, so I think they're quite 2015 too. They're brilliant if you're doing any kind of baking for charity because they're so easy to portion and transport. And children, who are less affected by trends, love them.

Cupcakes are also the flavour of the month for June's We Should Cocoa and Tea Time Treats blogging events, so perhaps they're not quite out of fashion yet.


Secret citrus and cream cupcakes
This is my go-to, all-time, never-fail chocolate cake recipe, upcycled with a touch of cream cheese and marmalade to make chocolate cupcakes with a secret gooey middle. Imagine something like a dark sticky chocolate cake wrapped around a citrus cheesecake filling and you've got the idea.

1 2/3 cups flour
1 1/2 cups caster sugar
1 1/2 tsp baking soda
2/3 cup cocoa
1 tsp salt
100g butter, melted and cooled
1 1/2 cups milk
2 eggs
1 tsp vanilla extract
2/3 cup cream cheese
2/3 cup thin-cut marmalade

Preheat the oven to 180C and put cupcake cases in 18 muffin tin holes.

Sift the dry ingredients into a large bowl and mix well. Add the butter, milk and eggs and beat furiously with a wooden spoon until well mixed (you can also do this in the processor or in a mixer).
Fill each cupcake case until it is about a third full, then put a teaspoon of cream cheese and a teaspoon of marmalade on top. Top with more cupcake batter, until each case is about two-thirds full. Bake for 15-20 minutes, until the cakes are springy and a skewer plunged into them comes out clean.
Remove to a rack to cool. Store in an airtight container.

Have a great weekend, everyone x

Friday, May 22, 2015

Coconut, chocolate and vanilla cake

When I rule the world, I'm going to introduce a law banning vanilla-flavoured perfumes and all forms of fake vanilla extract.
Real vanilla has such a beautiful, delicate scent, but it's been ruined by the synthetic variants wafting through a home near you.
Vanilla soap, vanilla perfume, vanilla moisturiser, vanilla candles, they'll all be banned. Fake vanilla extracts will be outlawed, too. Instead, we'll feast on real vanilla-scented cakes, like this tropical number.


Coconut, chocolate and vanilla cake
This has a triple dose of vanilla, but it's not overpowering. Just make sure you use the real deal. The combination of chocolate and vanilla - a powerful duo - makes this just right for this month's We Should Cocoa, hosted by the ever-lovely Karen of Lavender and Lovage.

125g butter, softened
1 cup caster sugar
4 eggs, at room temperature
1 tsp pure vanilla
2 cups desiccated coconut
1 cup flour
'1 1/2 tsp baking powder
pinch salt
3/4 cup roughly chopped dark chocolate

For the syrup:
1/2 cup boiling water
1/2 cup sugar
2 tsp pure vanilla

For the icing:
1/2 cup icing sugar
1 tsp butter
2 tsp pure vanilla
2 tsp boiling water

Heat the oven to 170C and grease and line a 23cm ring tin (or similar).
Cream the butter and sugar together until very light and fluffy. Add the eggs, one at a time, beating furiously. If it looks in danger of curdling, add a little of the desiccated coconut. When the eggs are all in, add the coconut and vanilla. Beat to combine, then fold in the sifted flour, baking powder and salt. Scraipe into the prepared tin and bake for 30 mins, until a skewer comes out cleanly. Leave in the tin for five minutes, then stab with a skewer (very satisfying!) and pour over the syrup (just stir together the boiling water, sugar and vanilla to make it).
When the cake has cooled, carefully remove from the tin and set on a plate.
Make the icing by beating together all the ingredients - you may need more boiling water to make it the right consistency - and drizzle it over the cake.

Have a great weekend, everyone x

Monday, April 27, 2015

Peaches, pistachio and chocolate

This is the inverse of Three Ways With - instead of being three ways with one ingredient, it's one way with three. Confused? Don't be. This photo explains everything.

Peaches With Pistachio And Chocolate

Peaches with pistachio and chocolate
This is such a simple idea I'm reluctant to call it a recipe. But it's worth sharing - not least because the the April edition of We Should Cocoa is all about no-bake things to do with chocolate. If you've got these ingredients close at hand, this is a five-minute job.

12 dried peach halves (I use the Alison's Pantry ones)
150g dark chocolate (I use Whittaker's Dark Ghana)
1/2 cup shelled pistachio nuts, roughly chopped

Lay the peach halves on a tray, cut side up.
Melt the chocolate - in a bowl over simmering water, or in a low oven - and spoon a little on top of each peach. Sprinkle each one with chopped pistachios and leave to set (about five minutes).
Serve immediately or store in an airtight tin.

Have a great week, everyone x

Friday, February 20, 2015

Double peanut brownies

My mother used to say that the definition of willpower was eating one salted peanut. She was wrong.

At least, she was right, but I've got an update. The definition of willpower is having a bag of salted peanuts in your house that you ARE NOT OPENING until you have tried them in a recipe you dreamed up during a particularly dull conference call.

Then, the definition of willpower is eating just one piece of the results. Reader, my willpower is lacking. Try these and let me know how you get on...

Double Peanut Brownie Bars Photo/Recipe: Lucy Corry/The Kitchenmaid

Double Peanut Brownies
In New Zealand, a peanut brownie is a crunchy cookie with peanuts inside it. Nice enough, but nothing to get excited about. By contrast, these are proper brownies, which is to say they are soft, slightly cakey and very moreish. They use two sorts of peanuts - ordinary blanched ones (which I can report are nowhere near as addictive as their roasted, salted cousins) - and the lovely, naughty salted ones. If you don't have the wherewithal to grind the peanuts, use ground almonds.

1 cup blanched, skinless peanuts
125g butter
3/4 cup brown sugar, loosely packed
5 Tbsp Dutch cocoa
2 free range eggs - fridge-cold is fine in this instance
1/2 tsp salt
1/4 tsp baking soda
3/4 cup roasted and salted peanuts

Heat the oven to 180C and line a small brownie tin (measuring about 25 x 20 or similar) with baking paper.
Grind the peanuts to a fine meal in a food processor - stop before they start turning into peanut butter!
Melt the butter over gentle heat, then add the sugar and cocoa. Stir over the heat for a minute, then remove and let cool for five minutes.
Add the eggs and beat well, then add the ground peanuts, salt and baking soda. Stir to mix, then tip in the roasted peanuts.
Pour the mixture into the prepared pan and bake for 20 minutes - it should be slightly wobbly in the middle. Let cool in the tin, then slice into bars. Store in an airtight container in a cool, dark place (hide them, they won't last long!).

Double Peanut Brownie Bars Photo/Recipe: Lucy Corry/The Kitchenmaid

After a bit of an absence, I'm joining in with my favourite blog challenge, We Should Cocoa. This month it's co-hosted by Katie at Recipe For Perfection - and the theme (you guessed it), is brownies..

Have a great weekend, everyone x


Tuesday, November 18, 2014

Chilli chocolate syrup + a chilli chocolate martini

It's about this time of year that I start to feel slightly panicked and wish I could run away to some kind of closed community where they don't celebrate Christmas, or have jobs, or blogs or Things To Worry About. Do you feel like that too?

The internet is the worst place to be if you're in that kind of mood, because CHRISTMAS is around every turn. Don't, whatever you do, venture on to Pinterest, or you'll fall into a deep depression at the realisation that you've failed dismally as a mother/partner/sibling/friend/member of society because you haven't planned your themed decorations, hand-stitched jaunty bunting or made 20 sets of Frozen-themed figurines of every kid in your child's class from air-dried clay. And you've still got to bake for the school gala, sort your invoices, locate the spare car key and send your dear friend her birthday present, now three months overdue (sorry Claire!). 

Fear not, friends, because I have a remedy to lift you to a higher place. It's chocolate chilli syrup - and if pouring it over cake or ice cream doesn't cheer you up, then adding it to a martini certainly will. Here's how.

Chocolate-Chilli-Syrup-Recipe

Chocolate chilli syrup
If you're stuck for easy DIY Christmas gifts, this should go on the list. It takes minutes, doesn't cost much and is extremely simple. It's my offering for this month's We Should Cocoa challenge, hosted by the lovely Shaheen of Allotment2Kitchen. No surprises in guessing this month's guest ingredient - it's chilli.

1 cup water
1 cup caster sugar
3 Tbsp good quality cocoa powder
1 tsp chilli flakes

Stir the sugar and cocoa together in a small pot, then add the water and mix well. Bring to the boil and let simmer for five minutes, then remove from heat. Stir in the chilli and let cool to room temperature. Strain through a fine sieve into a jar or bottle and cover tightly. Store in the fridge.

Choc-Chilli-Martini-Easy-Recipe

Chocolate chilli martini
Martini purists, look away now - this is very much my desperate housewife interpretation.

60ml ice cold vodka
30ml vermouth
30ml chilli chocolate syrup
ice

Put all ingredients in a cocktail shaker (confession: I use a jam jar) and shake well. Strain into a martini glass (or two, if you're generous).


Sunday, October 26, 2014

Pumpkin, prune and chocolate bars

I'm sure there's a Chinese proverb about disaster being the mother of invention, or danger being the signpost to opportunity, or something like that. I'm not sure that it's often successfully applied to baking, but there's a first time for everything.

Earlier this week I stumbled upon Nicola Galloway's recipe for chocolate chickpea cookies and pretty much decided I had to make them on the spot. We got through them really quickly and I figured I could whip up something quite similar, but with pumpkin instead of chickpeas, and prunes instead of dates. So this is the result - something inspired by, but completely different to, those cookies. And it's every bit as delicious.


Pumpkin, prune and chocolate bars
These soft, slightly chewy bars are very addictive - trust me, I've consumed several in the course of writing this post. The mix of ingredients means they're a perfect fit for October's We Should Cocoa challenge, this month hosted by Hannah at Honey and Dough. The slightly random nature of how this recipe came to be also means it's a strong contender for the October edition of Random Recipes - you can find out more about the criteria for this month here.
You do need to have some cooked pumpkin lying about for this recipe - do what I do and just throw a piece in the oven the next time it's on and let it bake away untended. Then scrape the soft flesh into a container and freeze it to make yourself feel super organised when recipes like this come along.

1 cup prunes
1 cup rolled oats
1 cup mashed pumpkin (or - if you must - canned pumpkin puree)
100g butter, melted
1 egg
1 tsp pure vanilla
1/2 tsp cinnamon
1/2 tsp baking soda
1/4 tsp salt
100g dark chocolate, roughly chopped

Tip the prunes into a small bowl and cover with boiling water. Set aside while you get everything else ready.
Heat the oven to 180C and line a small brownie pan (measuring about 27 x 20 cm) with baking paper, leaving some overhang.
Put the rolled oats into a food processor and whiz until finely ground. Tip out into another bowl.
Drain the prunes, then tip them into the processor, along with the pumpkin, melted butter and egg. Whiz until smooth, then add the ground oats, cinnamon and baking soda and whiz again until well mixed. Add the chocolate and pulse until mixed.
Scrape the mixture into the prepared tin and bake for 25-30 minutes, until set and slightly springy to touch. Let cool, then cut into bars. Store in an airtight container in the fridge.

Have a great week, everyone x

Monday, August 18, 2014

Ambrosia, food of the gods

If you grew up in New Zealand in the 1970s and 1980s, there's a good chance this pudding will be instantly recognisable. If not, it's high time you got acquainted.

Ambrosia-Recipe-Dessert

This is ambrosia, food of the gods. I remember it sweeping through parties and social occasions of my childhood like a tidal wave of cream, fruit and pineapple lumps. My mother never made it, which gave it extra cachet. To my 10-year-old self, ambrosia was just about the most glamorous pudding ever invented. 

Recipe-For-Ambrosia-Berry-Cream-Dessert

Thirty years later, I can vouch for many of its attributes. The mixture of cream and yoghurt is still tangy and rich, and it's great fun anticipating the surprise in each mouthful - will it be a marshmallow or a juicy berry? I doubt it's the food of the modern gods, given its extremely calorific ingredients, but it still makes a great pudding (or a very illicit breakfast).

Whipped-Cream-Berries-Marshmallows

Ambrosia
The great thing about ambrosia is that it doesn't require any fancy ingredients, can be made for an intimate dinner for two or a feeding frenzy for 20 and it appeals to just about everyone. Children adore it and adults, though they pretend they are too grown up to eat marshmallows, will dig into the bowl as soon as your back is turned. It's sort of an Antipodean Eton Mess, which makes it the perfect entry for this month's Sweet New Zealand blogging challenge. This month my lovely friends Michelle and Anna of Munch Cooking are playing host and they've given it a Wellington theme to celebrate Wellington On a Plate. It's also a fitting entry for the August edition of We Should Cocoa, in which guest host Rebecca of BakeNQuilt has chosen marshmallows as the special guest ingredient.

180ml (3/4 cup) cream
2 cups natural yoghurt (I particularly like The Collective's Straight Up yoghurt in this)
1 tsp pure vanilla extract
2 cups frozen berries - blueberries, raspberries, boysenberries, blackberries
2 cups mini marshmallows
100g chocolate, roughly chopped

Whip the cream until it forms soft peaks. Stir through the yoghurt and vanilla, then fold through the berries, marshmallows and chocolate (reserve a little of the chocolate to sprinkle on top). Cover and chill for at least 30 minutes before serving. I think it's best the day it's made, unless you're eating it sneakily for breakfast the morning after. Serves 4-6.

Have a great week, everyone x

Friday, June 13, 2014

Treat me: Gluten-free chocolate cakes

Forget war, forget inequality, forget child poverty and the melting of the icecaps, the thing that really gets people riled up is whether or not gluten is evil. Trust me, I've spent a lot of time moderating comments on a big mainstream news site and the vitriol directed at the gluten-intolerant is intense.

If you believe that people who need to avoid gluten for the sake of their health are attention-seeking worrywarts, look away now. Because the June We Should Cocoa challenge is all about gluten-free chocolate treats, and I've got a cracker of a recipe to share. You don't have to be anti-gluten to like it, but if you are, I hope it becomes a regular part of your repertoire.

Gluten-Free Chocolate Cakes With No Refined Sugar

Little chocolate cakes (gluten-free)
This is my adaptation of this recipe, which in turn is a redux of a recipe by Dr Libby. I found the original just a little bit dull and worthy, so have given it a bit of a makeover. This is the kind of chocolate cake you can put in your kids' lunchboxes and feel all smug about. It's also a good way to use up that sunflower seed butter I showed you how to make earlier this week. I think those holistic health types call that synergy.
If you want to make it even less worthy, put an extra square of good chocolate in the bottom of each muffin case before you add the mixture. Then you can call it pudding.

3 ripe bananas, mashed
2 eggs
2 tsp pure vanilla extract
3/4 cup nut butter
2 Tbsp oil - coconut, olive, whatever you have
1/4 cup honey
3 1/2 Tbsp best quality cocoa
1 tsp baking soda
1 Tbsp vinegar
50g best quality chocolate - I've used white in the photos, but any sort will do - roughly chopped

Heat the oven to 180C and put paper cases in a 12-hole muffin pan.
Put all the ingredients except the baking soda and vinegar into a food processor and whiz until smooth. Add the baking soda and vinegar and whiz again. 
Pour into a jug, then pour this into the muffin cases until they are two-thirds full. Sprinkle each one with the chocolate and bake for 15-18 minutes, until risen and cooked through. Remove to a rack to cool slightly before eating. They will deflate slightly.
These can be kept in an airtight container in a cool, dark place for about five days. The flavour intensifies the day after they are made. Makes 12.

Have a great weekend everyone x

Gluten Free Chocolate Muffins

Friday, April 04, 2014

Treat me: Homemade Easter eggs

I'm not really that keen on sweets or lollies, but it takes a lot of willpower for me to resist a marshmallow. This has been a lifelong problem - when I was about five I discovered a stash of marshmallows in a high cupboard and secretly scoffed the lot. I still remember the speech I got about how it was bad to take the marshmallows, but even worse to lie and pretend I hadn't. I've been a terrible liar ever since (and still feel guilty about indulging my marshmallow habit.)

How To Make Marshmallow Easter Eggs

Last weekend my friend Agnes came over and made a swag of beautiful Easter eggs while I found whatever kitchen tool she needed and kept our daughters out of the chocolate (one of those tasks was much easier than the other). Agnes and chocolate are like Picasso and paint - it's amazing watching her work. I was too embarrassed to make these eggs - the way I remember doing them with my mother - in front of her, but my taste for nostalgia (and marshmallow) meant I've been dreaming about them all week.

So if you've ever wondered how to make marshmallow Easter eggs at home without any fancy kit, this is how to do it.


Homemade Marshmallow Easter Eggs
Don't be alarmed - the flour and egg are only used in the shaping process. Both can be reused in the normal way. You need electric beaters, or preferably a stand mixer, to make the marshmallow. Don't attempt it with a rotary beater, it will only end in tears. This is a bit of a process but the results, which taste like chocolate-covered clouds, make it all worth it.

2 kg flour (use gluten-free flour if you have gluten woes)
1 egg - at room temperature (or the flour sticks to it)
1 Tbsp powdered gelatine
1/4 cup cold water
1/2 cup hot water
1 cups sugar
1/2 tsp pure vanilla
1/2 tsp rosewater
1 tsp lemon juice
Pink food colouring, optional
180g good quality chocolate - I used Whittaker's Fairtrade Creamy Milk
1 Tbsp coconut oil or other plain, flavourless oil

Spread the flour into two or three large, deep baking dishes. The flour needs to be about 5cm deep. Gently press the egg (in the shell) into the flour to make a half-egg shape to make 20 hollows. Carefully set aside.
Put the cold water in a small bowl and sprinkle over the gelatine. Stir well, then let swell for five minutes.
Put the hot water and the sugar in a large saucepan and stir over low heat until the sugar is dissolved. Add the gelatine mixture, stirring all the time, until it has dissolved too.
Bring this mixture to the boil and boil gently for six minutes. Remove from the heat and let cool until lukewarm.
Transfer it to a large mixing bowl (or the bowl of a stand mixer) and add the vanilla, rosewater and lemon juice. Beat on high speed until thick and creamy (about five minutes, depending on your mixer). If you like, add a few drops of pink food colouring when the mixture is nearly done.
Carefully spoon the marshmallow mixture into the egg shapes, making sure it comes to the top.
Let set for 15 minutes, then carefully remove the halves from the flour by touching the top of each one with your finger and lifting it out. Join the halves together (the top stays sticky, so they 'glue' together nicely) and dust off the flour. A pastry brush is helpful here.
Cover a tray with plastic wrap and set aside.
Leave the marshmallow eggs in a cool place while you melt the chocolate and coconut oil together in a double boiler over low heat. Let cool until lukewarm, then carefully dip the eggs in, using a fork or a dipping spoon, then put them on the plastic-covered tray. This is a messy job - just resign yourself to the fact that chocolate will go everywhere. When the eggs are covered (or as best as you can get them), put them in the fridge to set. Store them in a covered container in the fridge (wrap them in foil if you're really fancy). Makes 8-10 eggs, depending on how much marshmallow you eat in the process...

Given that this is such a chocolate-filled time of the year (in our house, at least), it makes great sense to add this post to April's We Should Cocoa challenge, where guest host Rachel Cotterill has chosen Easter as the theme.

Have a great weekend everyone x


Saturday, February 15, 2014

Treat me: Chocolate Cornflake Roughs

Some things are made for each other. Salt and caramel. Champagne and oysters. Walnuts and blue cheese. Chocolate and coconut. Then there's Random Recipes and We Should Cocoa - a match so perfect I can't believe they haven't joined forces before.


For this month's Random-Recipes-Meets-We-Should-Cocoa mash-up I had a very limited selection of books to choose from thanks to our ongoing renovations (it's hard to access the main part of one's cookbook collection when it's hidden behind a king-sized bed, two radiators and a mirror, don't you think?). Anyway, one of the few books I could reach was this handsome tome: a 1971 edition of The New Zealand Woman's Weekly Cookbook, edited by the incomparable Tui Flower.

The New Zealand Woman's Weekly Cookbook, 1971 Hardback

Like Random Recipes maestro Dominic, and We Should Cocoa founder Choclette, Tui Flower is a force to be reckoned with. She ruled New Zealand food writing from her test kitchen at the NZ Woman's Weekly for more than 20 years. At the NZ Guild of Food Writers' Conference last November she was spoken of with the utmost awe, if not a slight touch of fear.

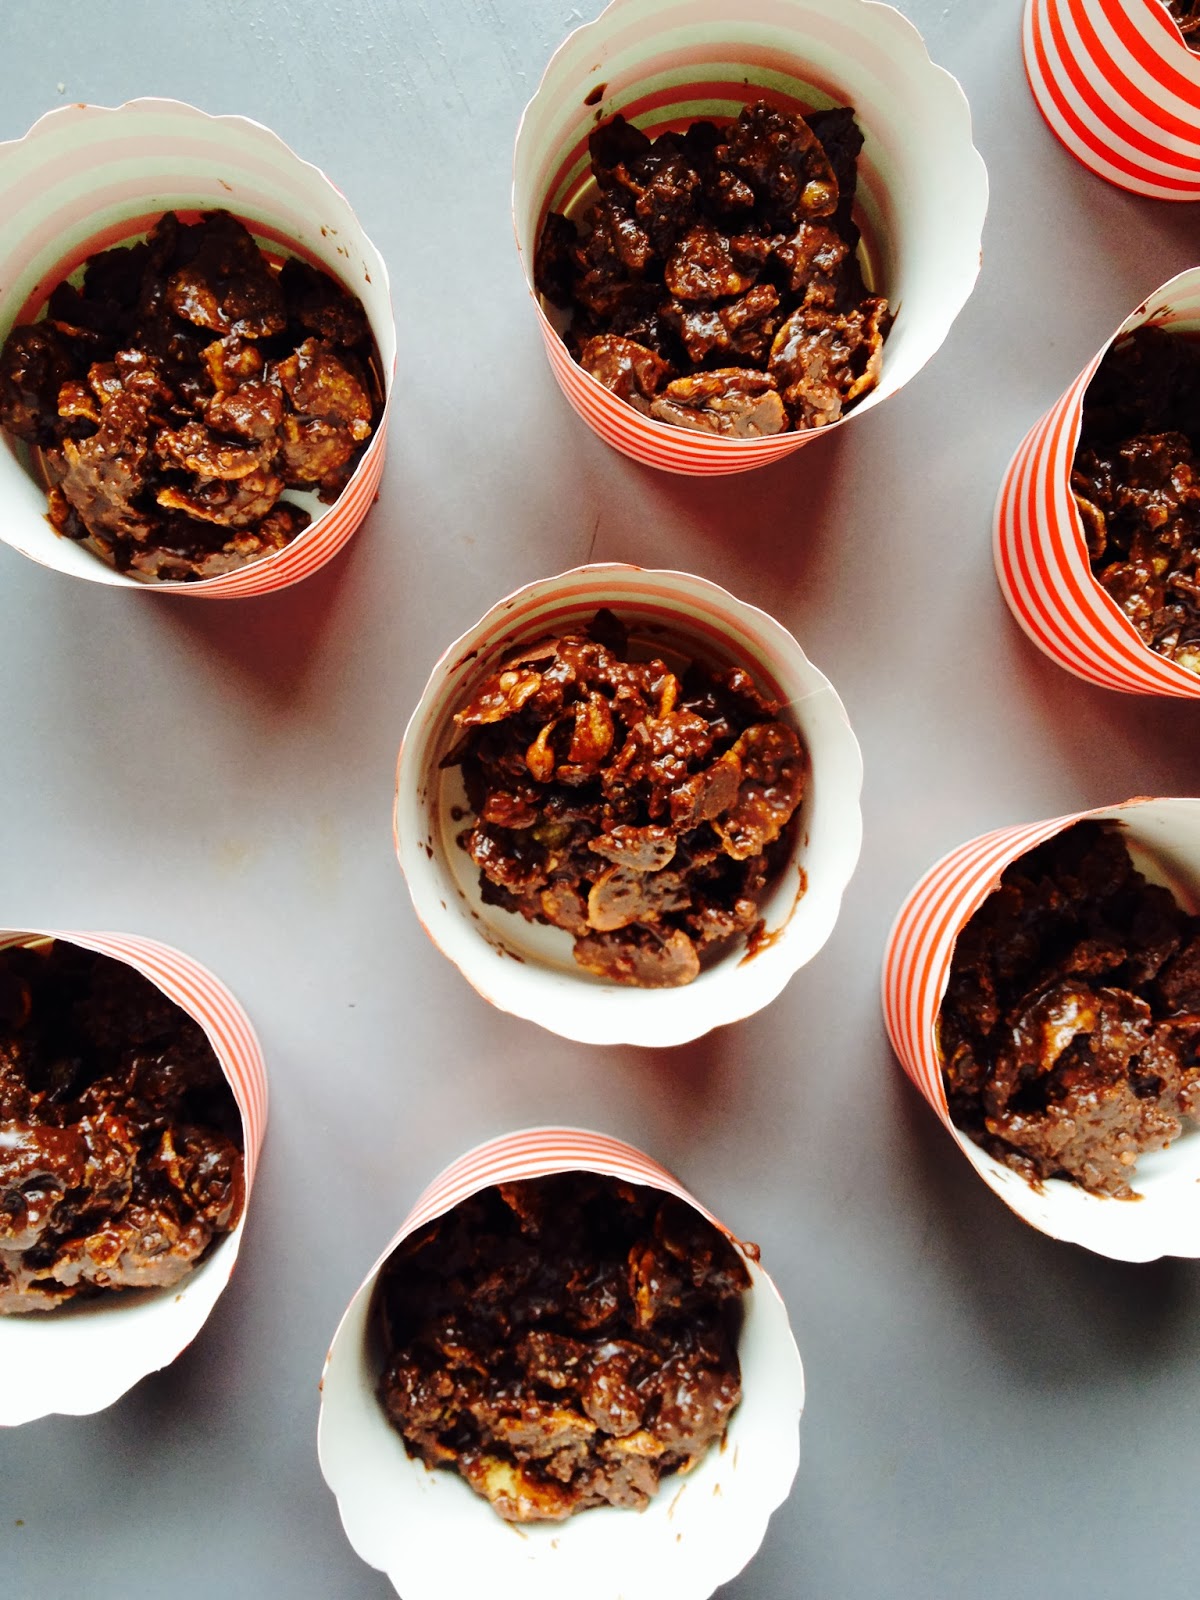
This book, though a little dated in parts, is a brilliant snapshot of New Zealand households in the 70s (and beyond). I rescued my copy from an charity shop and - while I'm unlikely to make Tui's recipe for 'Picnic Loaf' using a tin of spaghetti and sausages, among other things - I think it's a fine piece of culinary heritage. The recipe I ended up with here is another local icon. Chocolate Cornflake Roughs, or their close cousins, made with rice bubbles, were THE party food of choice when I was a child. They are very sweet, crunchy and best served very cold (ideally, without any children to share them with).

Chocolate Cornflake Roughs In Cupcake Cases

Chocolate Cornflake Roughs
As much as I respect and admire the work of Tui Flower, I've updated her 1971 recipe to reflect the contents of a slightly more modern pantry. The original recipe specifies 'crushed coconut biscuits' - in New Zealand that can only mean the delectable Krispies (which now even come in a chocolate-dipped form). If you don't have a similar biscuit, I suggest something like a digestive or chocolate wheaten. Hey, you could even use these. If you're not a fan of coconut oil, any light, neutral oil will work. Don't forget to use the best cocoa you can for an especially rich flavour. For that birthday party touch, use cupcake cases instead of a lined tray.

1/2 cup icing sugar
3 Tbsp cocoa
90ml coconut oil, melted
a drop or two of almond essence
1 cup cornflakes
9 coconut biscuits (as described above), crushed to make about 1 cup of crumbs.

Line a tray or a large platter with baking paper and set aside.
Sift the icing sugar and cocoa together into a bowl. Beat in the coconut oil and almond essence, then add the cornflakes and biscuit crumbs and stir until well combined. Drop spooonfuls of the mixture on the lined tray and leave in a cool place to set. Makes about 12.

Have a great weekend, everyone!


Saturday, January 18, 2014

Treat me: Triple coconut choc cake

Here is a cake that will apparently a) boost your potassium levels, b) make you thin and beautiful and c) not get you kicked out of Crossfit classes. Want a slice?


This humble-looking creation is packed with three forms of magical coconut - coconut oil, coconut sugar and coconut flour - yet it doesn't taste remotely coconutty (thanks to the two other ingredients, equally righteous free range eggs and FairTrade chocolate). You can't taste the coconut but it's what gives this cake its reputed powers.

Coconut oil is feted by many for its healing and beautifying powers (and it's endorsed by lots of celebs, so it must be good for you, right?). Fans believe extra virgin coconut oil helps maintain healthy cholesterol levels, nurtures the thyroid gland, boosts the metabolism, fights fungal infections, bacteria and viruses - and it makes your hair shiny. Add in coconut sugar (tastes and looks a bit like brown sugar, but has loads more minerals and a lower GI rating) and coconut flour (looks like ground almonds, high in protein and fibre, gluten-free) and you have a cake that could just about save the world. Or at least one that tastes brilliant.

Triple chocolate chocolate cake
I dabbled in coconut oil last year, which I blame on editing about 20,000 stories on the pros and cons of using it. It'll never replace butter, or even good extra virgin olive oil, in my affections, but it is easy to use and if it really is that good for you, so much the better. But I'd never tried coconut sugar or flour, so when I found them at my local organics shop, I decided to do a little experimenting in the name of this month's We Should Cocoa challenge. Guest host Linzi of Lancashire Food has asked us to use chocolate along with a 'new ingredient'. I've used coconut oil, sugar and flour in a reworking of an old recipe given to my sister by a chef friend. This version is light, not at all coconutty, and incredibly filling. You must try it.

100ml extra virgin coconut oil
100g good dark chocolate, at least 62 per cent cocoa solids, roughly chopped
3 eggs
150g coconut sugar
40g coconut flour

Grease and line an 18cm cake tin. Heat the oven to 170C.
Put the oil and chocolate in a small pot and set over low heat, stirring occasionally until melted. Set aside.
Beat the eggs and sugar together until pale (though the mixture will be a light brown, thanks to the coconut sugar) and thick.
Pour the cooled chocolate and oil into the egg mixture and stir to combine, then sift in the coconut flour. Fold together and pour into the prepared tin.
Bake for 25-30 minutes. The cake will still seem very wobbly but it will firm up as it cools. The edges should be just set when you remove it from the oven. Leave to cool in the tin, then turn out very carefully onto a plate. Dust with icing sugar (I don't think they make a coconut version of icing sugar, yet) and serve with a good dollop of Greek yoghurt or whipped coconut cream. Or you could try this recipe for DIY coconut yoghurt, which sounds amazing.

Have a great weekend, everyone x

Friday, December 13, 2013

Treat me: Rum and raisin ice cream

This week, in between re-telling the story of the nativity ("but Mum, why was the baby Jesus a boy? Can he be a girl!"), I have been reading The Man Whose Mother Was A Pirate. In case you're not familiar with this Margaret Mahy classic, it tells the story of a buttoned-down chap who is enticed away from his dull, everyday life by his sea-faring mother. It's such a good read. Put it on your Christmas present list. I wouldn't say the same for another book that was on high rotate here a couple of weeks ago - a flimsy yarn that saw the hapless Captain Pugwash in a standoff with a bunch of pirates over some chocolate smuggling. If your child makes a beeline for this at an op shop, point them in another direction.

Anyway, thinking about pirates and mulling over the December We Should Cocoa challenge, in which Choclette has sensibly chosen alcohol as the key ingredient, led to this ice cream. It's not so alcohol-soaked that one scoop will send you off into paroxysms of piratical rumbustification, but I'd advise against giving it to children (even if their mothers are pirates).

Easy Rum And Raisin Ice Cream

Rum and raisin ice cream
No need for a fancy machine to make this ice cream - why, you could even make it in the galley of a galleon (as long as it had a freezer). If you're not a fan of traditional Christmas puddings, this is a great do-ahead dessert. Freeze it in a large lined loaf tin (or even a cake tin), then serve slices with little tots of rum and chocolate sauce. If you are a fan of proper Christmas pudding - or even Christmas mince pies - then a dollop of this on top is a delectable alternative to brandy butter.

1/4 cup dark, smoky rum
1/2 cup raisins
2 egg yolks
1 egg
1/4 cup brown sugar
1/2 cup golden syrup
500ml cream
70g dark chocolate, roughly chopped into pieces no bigger than a raisin

At least two hours before you're ready to make the ice cream (and therefore at least eight hours before you want to eat it), put the raisins and rum in a small bowl. Cover and set aside.
When you're ready to make it, beat the egg yolks, egg and sugar until pale and thick. Use electric beaters unless you have the arms of a sailor.
Drain the rum into the egg mixture (reserving the raisins), then add the golden syrup and beat again. Pour in the cream and beat until soft peaks form. Scatter over the raisins and chocolate and fold in. Pour into a plastic container and freeze for about six hours before eating. Makes about 1.3 litres.

Have a wonderful weekend, me hearties x

Friday, November 15, 2013

Treat me: The ultimate Afghans

Yesterday my beloved and I drove to work together. This never, ever, happens (upon reflection, it's probably the secret to domestic bliss) and by the time we'd dropped off the Small Girl and made it into the city we had managed to disagree about just about every topic you can think of.
By the time he'd made it home that night I'd thought of the one thing we hadn't raked over in the 20 minutes in the car - whether or not walnuts belong on Afghan biscuits. He says no, I say yes. And since I make them, I get to choose. If only all marital disagreements were as easy to solve.


Unless you grew up in New Zealand, Afghan biscuits are probably a complete anathema. They don't sound like much - a mixture of butter, sugar, cocoa, flour and cornflakes, topped with chocolate butter icing and the contentious walnut half - but, made well, they are heavenly. Unfortunately, they're not often made that well - they're the sort of thing you see in low-rent bakeries or on supermarket shelves. Here, the beloved and I are in total agreement. "Those supermarket ones are horrible," he says vehemently. "They're all flat and soggy and the icing is disgusting."
Good Afghans - that is to say, the ones I make - are dark, rich and completely addictive. They're the perfect contender for this month's We Should Cocoa challenge, which guest host Rebecca of BakeNQuilt has decided is all about cookies. Throw away your Edmonds' Cookbook instructions and make these instead.

The ultimate Afghans
My dear friend Anna taught me how to make Afghans and once you've made them her way, you'll never turn back. The first secret is to cream the butter and sugar together for ages - as if you were planning a cake - and then beat it some more. Secondly, make them big. Thirdly, use the best cocoa you can - for these ones I used half the best supermarket-sourced cocoa and half Equagold Dutch process cocoa (I'm not being paid to say that, I just really like it). This recipe makes eight large Afghans.

200g unsalted butter, softened
1/2 cup caster sugar
1/2 cup cocoa
1 cup plain flour
2 cups cornflakes

For the icing:
2 Tbsp unsalted butter
2 Tbsp cocoa
1 tsp golden syrup
1 cup icing sugar, sifted
8 perfect walnut halves

Heat the oven to 180C and line a baking tray with baking paper.
Cream the butter and sugar together until very soft and pale. Then beat it a bit more for good measure. Beat in the cocoa until well blended, then sift in the flour. Mix well, then stir in the cornflakes. Use your hands to ensure the mixture is well combined, but don't crush them too much.
Divide the mixture into eight patties - mould them in the palm of your hand, as if they were burgers. Place on the prepared tray and bake for 20 minutes.
Let cool on the tray for 10 minutes, then carefully transfer to a rack to cool completely.
While you're waiting for the biscuits to cool, make the icing. Melt the butter in a small saucepan, then add the cocoa. Stir over the heat for a minute or two, then add the golden syrup. Remove from the heat and sift in the icing sugar. Beat well, adding a teaspoon or two of hot water to get it to the right consistency.
When the biscuits are cold, top with a good splodge of the icing, then squash a walnut on top. Go on, do it.

Have a great weekend, everyone x

Friday, October 11, 2013

Treat me: Choc beet banana bread

I have a terrible confession to make. Somehow, against my better judgment, I have become completely addicted to The Block NZ. Three nights a week I find myself glued to an hour of hideous product placement and manipulated 'drama' as four couples 'race' to do up four dilapidated houses aided by teams of trusty tradies. I despise myself, but I can't stop watching.

The other night I tried to mix watching it with making some chocolate beetroot banana bread for our neighbours after they kindly lent us their car park. It was all going well until I pulled it out of the oven and realised I'd made a brick that was better suited to hard landscaping than eating. The Block-ers might have forgotten to install their bathroom mirrors, but I'd forgotten the baking powder. And the baking soda. I have vowed never to watch The Block again. Well, at least not until next week...


Chocolate beetroot banana bread
This month the clever Ness of JibberJabberUK is guest hosting my favourite blog challenge, We Should Cocoa. Aided and abetted by challenge founder Choclette, Ness has chosen vegetables as this month's special guest ingredient. I know beetroot is a bit of an obvious one, but it's a good addition to this chocolatey banana loaf. As is baking powder. And soda. You have been warned!

3 ripe bananas, mashed
3 eggs
3/4 cup brown sugar
1/2 cup oil
1/2 cup milk
1 Tbsp vanilla essence
2 Tbsp lemon juice
120g grated beetroot
2 cups white spelt flour
1/2 cup good quality cocoa
1 Tbsp cinnamon
1 Tbsp baking powder
1/2 tsp baking soda
1 tsp salt
50g dark chocolate, smashed into little bits

Preheat the oven to 175C. Grease and line a large loaf tin.
Put the bananas, eggs, sugar, oil, milk, vanilla and lemon juice in the bowl of a food processor. Whiz until smooth.
Add the beetroot and pulse until the mixture is uniformly pink. Sift over the flour, cocoa, cinnamon, baking powder, baking soda and salt. Add the chocolate. Pulse again until smooth.
Pour the mixture into the prepared tin and bake for 35-40 minutes, until a skewer comes out clean. Remove from the oven and cool in the tin for a few minutes, then turn out on to a wire rack to cool completely.

In other news, The Kitchenmaid has been nominated in the Best Kids Food Blog section of the 2013 Munch Food Awards. I feel a bit of a dork asking, but if you'd like to vote for me, you can do so by clicking here.

Have a great weekend everyone!


Friday, September 13, 2013

Treat me: Chocolate Mousse Cake

Our fridge, not to mention our bellies, are still recovering from an epic feast we had last weekend - dinner for six adults and as many children involving a three-kilo piece of pork shoulder, sacks of Turkish buns, a crunchy slaw made from a Savoy cabbage and several fennel bulbs and a vat of homemade barbecue sauce. Amazingly there were still lots of delicious leftovers, which is why I haven't posted any recipes this week. There was even a bit of the show-stopping pudding left over, which I hid at the back of the fridge as a cook's perk.

I dreamed this dessert up to celebrate the third birthday of We Should Cocoa - which this month has the thrilling theme of 'Showstopping Cakes'. This one was such a showstopper that I couldn't waste any time photographing it, which explains the slightly odd shot below.


Chocolate Mousse Cake
Take a look at the ingredients for this showstopper and you'd be right in thinking that it's more like a heartstopper - with nearly a litre of cream involved it's not going to win any Heart Foundation prizes. But it serves at least eight, with a generous slice left over for the cook to hide in the fridge to eat later. There are three stages, but none of them are particularly onerous. You must, however, make the pavlova the day (or night) before you want to serve the cake and allow at least four hours' resting time in the fridge once you have assembled it. Don't be put off by the length of the recipe - it's not at all tricky to do.

For the pavlova base:
2 1/2 cups (560g) caster sugar
6 egg whites
3 Tbsp cocoa

For the mousse:
200g dark chocolate (at least 60 % cocoa solids), roughly chopped
400ml cream. split into 2 x 200ml measures

For the topping:
500ml cream
50g dark chocolate, roughly chopped
50g almonds, roughly chopped (optional)

First, make the pavlova. Heat the oven to 180C and line a tray with baking paper. Put a 28cm cake tin on the baking paper and draw a circle around it - this will help be a guide for the pavlova.
Using a freestanding mixer or a very powerful electric beater, whisk the egg whites until frothy, then gradually whisk in the sugar. Beat for 15 minutes, or until the sugar has dissolved. The mixture will be very thick and glossy. Sift over the cocoa and fold in, then dollop the mixture onto the prepared cake tin. Carefully put the tray into the oven, then bake at 180C for 10 minutes. Turn the heat down to 90C and leave the pavlova in the oven for 10 hours, until very dry and hard. Turn off the heat and let the pavlova cool completely in the oven.

When you are ready to start assembling the cake, get the mousse ready. To do this, heat 200ml of the cream in a medium saucepan until boiling point. Remove from heat and tip in the chocolate. Let it sit for a minute, then stir well until the chocolate melts and the mixture is smooth and glossy. Set aside to cool briefly while you whip the other 200ml of cream until it forms soft peaks. Gently fold the chocolate mixture into the cream and set aside.

Next, line the bottom and sides of the aforementioned 28cm springform cake tin with plastic wrap. Cut out a circle of the pavlova to fit into the tin. If your pavlova is very tall, slice it horizontally through the middle so you have two discs. Line the bottom of the tin with one of the discs of pavlova (or pack the bottom of the tin with the remaining pieces). Pour over the chocolate mousse, then top with the other disc or pieces of pavlova. Loosely cover with plastic wrap and put in the fridge.

Take a breather for a moment, then whip the 500ml cream to soft peaks. Remove the tin from the fridge and dollop the cream on top of the mousse and cream layers. Scatter with the roughly chopped chocolate and nuts. You can also crumble any remaining pavlova bits on top. Cover loosely with plastic and leave in the fridge for at least four hours to allow the mousse to set and the cream to soak into the crispy meringue.

To serve, carefully unclip the tin and peel away the plastic wrap before transferring the cake to a suitably glamorous dish. Serves 8-10.

Have a great weekend, everyone!

Friday, August 30, 2013

Treat me: Chocolate prune truffles

My father loved chocolate of all kinds, but most of all the dark, rich, expensive sort. The first Father's Day after he died I found myself in a posh chocolate shop trying to decide what to buy him. I was just about to make my selection before I remembered - there was no dad to buy them for. Even now I find myself looking at books or recipes and thinking, 'Dad would love this'. I was thinking about his love of chocolate and dried fruit when I started tinkering with these truffles.


Chocolate Prune Truffles
These are child's play to make - providing you have a child who likes supervised play that involves a food processor - and virtuous enough for the most health-conscious dad while tasting incredibly indulgent. Forget about your prune phobia and make them, now.

200g pitted prunes
100g ground almonds
2 Tbsp cocoa
1/2 tsp vanilla paste
1 Tbsp honey
50g dark chocolate, roughly chopped, plus 150g dark chocolate for dipping

Line a shallow baking dish or similar with baking paper and set aside.
Put the prunes in a food processor and whiz to a coarse paste. Add the ground almonds, cocoa, vanilla and honey and whiz again, then pulse in the 50g chocolate.
Take small teaspoon-sized blobs of the mixture and roll into balls. Put them on the prepared tray and put them in the fridge for about 15 minutes (longer, if you need to).
Carefully melt the 150g dark chocolate - a double-boiler arrangement is the safest option, unless you have a microwave - then dip the balls into it. Leave to set, then store in an airtight container in a cool place. Makes 24 small balls (allowing for a reasonable amount of sampling during the making process).


If you're really not sure about chocolate and prunes, you could always check out the truffles other bloggers have been making for August's We Should Cocoa challenge. Guest host Elizabeth and challenge creator Choclette have kindly let me slot this recipe in at the last minute - and from a quick look at some of the others, it's in very good company.

Have a great weekend, everyone, and happy Father's Day for Sunday to Antipodean dads everywhere.

Friday, June 14, 2013

Treat me: Chocolate mint bars

When I was a child and my parents went out for dinner, the next morning there would often be a gold-wrapped after-dinner mint on my bedside table - a treat from the night before. I'm sure Mum was the selfless one - Dad couldn't go past any kind of chocolate - and I always thought it was incredibly glamorous (bearing in mind it was the early 1980s). Restaurants no longer offer after-dinner mints to departing diners (at least, not the restaurants I go to), which is a great shame because there's something irresistable about that crisp chocolate shell and melty mint middle.
Anyway, the reason I started thinking about after-dinner mints was that mint is the special guest ingredient in this month's We Should Cocoa challenge, guest-hosted by Victoria of A Kick At The Pantry Door. Here's what I came up with.


Chocolate Mint Bars
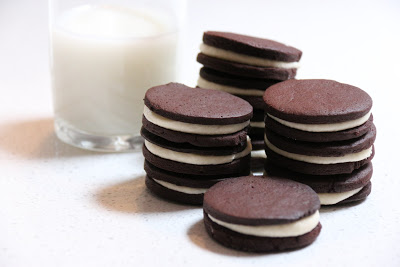
This is so easy - the hardest part is waiting for it to set. If you don't have or don't like Oreos, I think it could work with any Mint Cremes or any dark chocolate biscuit. If you're using biscuits with a creamy filling, wait until the chocolate and cream mixture is quite cool before adding them or they will melt. Feel free to increase or reduce the peppermint essence (or oil, if you can get it). Either way, don't measure it over the bowl - the laws of baking gravity will ensure you accidentally tip in much more than you intended.

150ml cream
150g dark chocolate (the darker the better - I used 70 per cent cacao), roughly chopped
150g Oreo cookies (a packet)
1-1/2 tsp peppermint essence to taste

Line a large loaf tin with baking paper, leaving enough of an overhang so you can pull the finished product out easily.
Put the cream and chocolate into a small saucepan and set over very low heat. Keep a close eye on it - as soon as the cream looks like it is about to simmer, take it off the heat and stir well until the chocolate has melted and the mixture is smooth. Set aside to cool for 10 minutes.
Crumble the Oreos with your fingers - you want them in bits, not crumbs, so they add a crunchy texture - and add to the chocolate-cream mixture, along with the peppermint essence. Stir and taste - add more if you want it to be really minty.
Pour the mixture into the prepared loaf tin and smooth the top, then put it in the fridge to set (about an hour, best after two). Carefully lift out using the baking paper and cut into slender bars. Store in an airtight container in the fridge.

Have a great weekend, everyone! x

Friday, May 10, 2013

Treat me: Tropical Blondies

The checkout operator leaned conspiratorily over the trolley. "Are you sure you want those?" she asked, her hand poised above a tin of Thai mangoes. "I bought some last week and they're not very nice."
I looked at her, then I looked at the mangoes. "Not very nice in what way, exactly?" I said, using the eyes in the back of my head to keep track of the Small Girl as she climbed a mountain of packing boxes.
The checkout operator screwed up her face: "Too mushy," she said. "Good for cooking though, I suppose."
We both looked up as a loud crash sounded from the direction of the boxes. "That's ok then," I said as I gathered up the rest of the groceries and handed over my card. "That's exactly what I want them for."
Nothing beats a fresh mango, but the tinned ones do have their place. Specifically, they have a place in these light, luscious blondies. Would it be weird for me to take them to the supermarket to show the Doubting Thomasina on the checkout, do you think?


Tropical Blondies
Mango is the special guest ingredient in May's We Should Cocoa challenge. This month, founder Choclette has handed the reins over to the lovely Shaheen of Allotment 2 Kitchen - who used to go by the nickname Mangocheeks. These days she goes by the name of Incredibly Busy Person, having mostly traded blogging for running a vegetarian cafe in Wales.
I'm no expert on Welsh cafes (let alone Welsh vegetarians) but I think these blondies would sell like hot cakes there. They're very light and easy to eat, not least because I've used fruit - pureed mango and banana - to replace some of the butter, sugar and eggs in a normal blondie/brownie recipe. Little nuggets of dried mango add to the fruity flavours.

1 x 425g tin of mango, drained and pureed (about 230g mango flesh)
200g unsalted butter, diced
200g good quality white chocolate, roughly chopped
2 eggs
150g mashed banana (about 1 1/2 ripe bananas)
200g caster sugar
150g white spelt flour (or plain white or gluten-free, depending on your cupboards)
1 ½ tsp baking powder
Pinch of salt
60g dried mango, snipped into small pieces

Preheat the oven to 180C and line a brownie pan (I use a tin about 30cm x 20cm).
Put the chocolate and butter into a heatproof bowl and melt gently by putting it into the warming oven. Keep an eye on it - it will take five to 10 minutes. This is a stress free, energy-efficient way of melting chocolate without having to worry about double boilers and the like.Let it cool slightly to room temperature.
Beat the eggs and sugar together until thick and fluffy (I do this with the whisk attachment of my freestanding mixer), then beat in the mashed banana. Add the cooled, melted chocolate and butter and the mango puree.
Sift over the flour, baking powder and salt, then fold in gently. Scatter over the dried mango and fold in.
Pour the mixture into the prepared tin and bake for 25-35 minutes. Timing is everything with brownies - you want them firm at the edges but still slightly wobbly in the middle. Leave them in the tin to cool for 15 minutes, then turn out onto a rack to cool completely. Cut into bars when cold and store in an airtight container. These also freeze well (and can be eaten while frozen!)

Have a great weekend, everyone, and a very happy Mother's Day on Sunday x

Friday, April 19, 2013

Treat me: Chocolate Honey Buns

No matter how hard I try, our Easter chocolate mountain is showing no sign of shrinking. I've a feeling chocolate rabbits are as prolific breeders as their furry counterparts - though I'm not sure how they produced the chocolate seahorses lurking in the pantry. In a bid to both use up some of the chocolate and make us a weekend breakfast treat, I've devised the following recipe. It's also handily suitable for April's We Should Cocoa challenge, in which honey is the special guest star ingredient.


Chocolate Honey Buns
I had all sorts experimenting with hiding different sorts of chocolate inside the dough when I made these, though not as much fun as my little assistant, who managed to swipe two buns off the bench while I was hunting for the camera.
Little, solid chocolate Easter eggs worked well, but anything with a truffle-y, toffee-y centre was less successful and tended to ooze out everywhere. 'Normal' dark chocolate is probably best in terms of flavour and keeping its shape..
This is a very sticky dough, so it's best handled in a freestanding mixer with a dough hook. If you've got forearms of steel and lots of patience, by all means do it by hand.


450g strong white flour
1 1/2 tsp dried yeast
1 1/2 tsp salt
1/4 cup honey
275ml milk
1 large or 2 small eggs
70g butter, at room temperature, cut into small slices
12 - 24 squares of good chocolate - or small Easter eggs, seahorses, bits of bunny or other random chocolates
50ml milk, for glazing

Put the milk in a small pot and bring to a simmer. Stir in the honey and let cool to blood temperature.
Mix the flour, salt and yeast together in the bowl of a freestanding mixer. When the milk and honey mixture has sufficiently cooled, add it and the egg(s) to the dry ingredients. Beat well with a wooden spoon, then turn on the mixer and mix at medium speed for five minutes until a smooth and shiny dough forms. Add a slice of butter and wait for it to be amalgamated into the dough, then repeat with the rest until it is all in.
Cover the bowl with clingfilm and set aside in a warm place until it has nearly doubled - about an hour or so.
Heat the oven to 180C and grease a 12-cup muffin tin.
Turn the dough out of the bowl and punch down lightly. Divide into 12 pieces. Roll each one into a ball, inserting a piece of chocolate as you go. Place in the muffin tins.
Brush the buns with milk and bake for 20-25 minutes, until well risen and golden brown. Leave in the tin for five minutes, then turn out onto a rack. These are at their very best eaten hot, while the chocolate is still molten, but they're still good at room temperature. They also freeze well, but I doubt you'll have many left over.


Have a great weekend, everyone

Friday, March 29, 2013

World famous chocolate recipes

OK, everyone, it's time to pull on your legwarmers, leotards and headbands: it's the We Should Cocoa Fame round-up. Since I'm writing this post with the Fame theme going round and round my head, here's the link so you can listen along at the same time. Catchy, isn't it?

We Should Cocoa usually asks participants to match chocolate with a special guest star ingredient, but this month I thought it might be fun to try something different. Instead, I asked everyone to come up with a 'famous' chocolate recipe - whether it was from a famous person, world-famous in their street, or just deserved wider recognition. Here's what they came up with...

We Should Cocoa newbie Nicole Bremner dived in at the deep end and managed to reinvented the world-famous Oreo cookie not once, but twice. She's made a vegan and a fructose-free version - and both look amazing. Nicole's blog is new to me and it's full of lovely things. You should check it out.


The always-inspiring Karen of Lavender and Lovage is famous enough in her own right (did you know she was a World Baking Day ambassador?) and she whipped up a treat with her usual joie de vivre. Her Famous Drinking Chocolate Cake took me back to the days of eating drinking chocolate out of the packet... come on, I know I'm not the only one to have done that!


And the similarly famous Dom of Belleau Kitchen, a legend in Lincolnshire, acquitted himself nicely with this Gluten-Free Chocolate Fudge Cake. Put this on your must-make list if you a) need something kosher for Passover next year and b) need to eat more vegetables (because it's got potato flour in it. Cool, huh?)


Meanwhile, Craig of The Usual Saucepans chose a sachertorte by the lesser-known Delia Smith. And he made it for his Mum. Isn't that cute?


Some guy called Nigel Slater, who apparently keeps some sort of kitchen diary (like Bridget Jones, do you think? Or Adrian Mole?) inspired Camilla of Fab Food 4 All to make this Pear, Ginger and Chocolate Crumble. Well played, Nigel old chap.


Mr Slater also inspired Kate of Turquoise Lemons - check out his (and her) Hot Chocolate Puddings. The man himself even tweeted her about them!


We Should Cocoa co-founder Choclette of Chocolate Log Blog was also inspired by a famous figure - and her post about Garibaldi Biscuits is a must for anyone who ever thought the Italian revolutionary had time to stop and bake along the way.


Phil of As Strong As Soup was inspired by some folks from a bit closer to home - the mysterious Debdens who apparently created this luscious Chocolate Pudding. Rumour has it the Debdens now own a weight-loss empire. Or they invented Photoshop.


Elizabeth at The Law Students Cookbook chose Nigella's Chocolate Muffins - a recipe that certainly deserves wider fame. If you haven't made these yet, add them to your repertoire, quick.


Caroline at Caroline Makes certainly deserves wider fame and fortune - she gets the prize for the cutest entry this month with her fabulous Pigs In Mississipi Mud Pie. Isn't it brilliant? Check out her blog for close-ups of those pigs, which she made with her own fair hands.


Johanna at Green Gourmet Giraffe also slaved over a fabulously decorated cake - a Pirate Treasure Chest - for her daughter's fourth birthday. Johanna is famous among her friends (and blog followers) for her incredible novelty cakes (last year she made THREE cakes for her daughter's third birthday!) and this one deserves its place in her hall of fame. Read her post first if you're considering making a cake of this nature in a heatwave as it may make you reconsider.


I wonder what Johanna, who hails from Melbourne, would make of the next entry - Caroline of Cake, Crumbs and Cooking took on Dan Lepard's Double Chocolate Lamingtons. A version of his recipe drew a bit of flack when it was published on Australian website Good Food (some readers sniffed that these fancy pants variations weren't real lamingtons) and Caroline did have a few issues with it. I wouldn't say no to one though.

Suelle at Mainly Baking approached the task in a clever way - she chose a famous ingredient as the starting inspiration and poured a cup of Guinness into this Chocolate Guinness Cake. Just look at that icing!


Ness at Jibber Jabber UK had a similar idea - she also made Nigella's Chocolate Guinness Cake, but adapted it to suit a thrifty budget. We all need one of those, don't we?


Claire of Under The Blue Gum Tree was among those who cursed me for my choice of theme, but after a few false starts she rose to the challenge brilliantly by making this Layered Cappuccino Mousse, apparently the dessert served at this year's Golden Globe Awards.


Hannah of Corner Cottage Bakery was also inspired by the screen - she made this incredible Twin Peaks Tart after a bout of illness saw her confined to the sofa with Agent Cooper and his pals. Worth getting sick for, I'd say!

I also went for something inspired by the small screen - adapting English actor Martin Clunes' recipe for Cold Dog Biscuits. I got so addicted to this I had to take it to work to stop myself eating it slice by tiny slice.


Meanwhile, Katharine of Leeks and Limoni delved into the fascinating history of the humble chocolate chip cookie, coming up with these gorgeous Chocolate Chip and Pecan Oat Cookies.


But if cookies seem too wholesome and you have a taste for the dark and rich, you'll love this Mississipi Mud Pie, chosen by Cookbooks Galore...


... Not to mention this incredible Better Than Nutella Cheesecake from The Taste Space - believe it or not this is made from raw ingredients (so hot - but not too hot - right now). I want some.


I also want a big slice of Susan of The Spice Garden's Peanut Butter And Chocolate Mud Pie. No, scratch that, I want two. Susan pays homage to Debbi Fields (of Mrs Fields' Cookies fame) in her post, but one look at this pie and you'll want to pay homage to Susan. Or at least find out her address.


I don't know about you but I need a lie down and a cup of chamomile tea after all that lot. Oh, go on then, maybe I'll have a hot cross bun too.

Have a great Easter weekend, everyone x