Remember when coconut oil was going to save us all? I'm not sure it's happened yet, given that the world needs saving more now than ever before. If you've doubted that coconut oil is a miracle product, this podcast will be music to your ears. If you're like me, and love coconut purely for reasons of greed and culinary usefulness, you might be interested in this week's Three Ways With... column, which features three delectable recipes for coconut in various forms (including oil, though it is most definitely not a recipe with any health claims).
I make no health claims for the following recipe either, except to say that making - and eating - it makes me extremely happy. Since happiness is closely related to wellness, I think I can justifiably say that a slice of this is very good for you.
Spicy Persian Love Cake
This recipe is an adaptation of Sam Mannering's Persian Love Cake, which seems itself to be adapted from an internet-famous recipe by Australian chef Gerard Yaxley. I was inspired to make this version after Karen Dennison of Coyo sent me some of her wares to try. While Coyo's chocolate coconut yoghurt is outrageously good (rich, yet with a tangy finish) and the passionfruit one is lovely, I was most taken with the chai version, which is made with Hakanoa ginger syrup. To stop myself from eating through a tub in one go, I turned the rest into this just-as-addictive cake.
1/2 cup dried dates
1/2 cup walnut halves (about 40g)
1 1/2 cups whole almonds (about 200g)
1 scant cup lightly packed brown sugar
80g soft unsalted butter
1 egg
3/4 cup Coyo Chai coconut yoghurt
finely grated zest of two oranges
Heat the oven to 180C. Grease and line a 20cm tart tin (or springform cake tin).
Soak the dates in boiling water for five minutes, then drain.
Put the nuts in a food processor and whiz to fine crumbs. Add the dates, sugar and butter and whiz again until well combined. Press half of this mixture evenly into the prepared tin, creating a 1cm-ish rim at the sides.
Add the egg, yoghurt and orange zest to the remaining mixture in the food processor and whiz again until smooth. Carefully pour this mixture into the tin.
Bake in the preheated oven for 30-35 minutes, until the top is dark golden and the middle is just set (it will continue to firm up as it cools). Cool on a rack, then refrigerate until ready to serve. Cut into thin wedges - a little goes a long way - and serve with more yoghurt or whipped cream. Any leftovers keep well in the fridge.
How do you feel about the so-called healing powers of coconut?
Showing posts with label Party. Show all posts
Wednesday, June 07, 2017
Three ways with coconut + Spicy Persian Love Cake
Labels:
Baking,
Cake,
Gluten-free,
Good Things,
Nutrition,
Nuts,
Party,
Pudding,
Recipes,
Winter
Posted by
Unknown
at
08:07
9 comments:
Tuesday, September 06, 2016
Chunky white choc, orange and cranberry slice
I read something last week about how 'invisible prisons' - jobs, societal pressures, parenting, caring for older relatives - meant that modern women are shackled with more responsibilities than their mothers and grandmothers. I don't know if that's true. Personally, if that's the price I have to pay for being able to vote, drive, own property and be generally free to do what I like, I'm fine with it. But last week I did find myself wishing I did a bit less. There's nothing like racing home after work on the night of the school production and remembering en route that you were supposed to bake something for the cake stall to give you conniptions, is there?
Now, I know I could have ignored the cake stall request, or I could have been more organised and done it a few days in advance. But I didn't do either of those things. Instead, I whipped up this slab of deliciousness in 20 minutes, while concurrently making boiled eggs for dinner and getting the child in and out of the bath. We then made it to the show on time, and all the lovely mothers (it's always mothers, isn't it?) who are so good they even RUN THE CAKESTALL cooed over the slice and wanted the recipe. In that moment, I felt a little bit less like a failure and more like a contributing member of society, even if my child was appearing in the show with a whopper of a black eye. But that's another story.
Chunky white choc, orange and cranberry slice
There are a zillion versions of this slice and the world probably doesn't need another one, but if you have weeks where the wheels are coming off and yet you still need to 'bake', this will save your bacon. Or bakin'. Or something.
Anyway, this version is better than all the others because it's big and chunky, and therefore more satisfying to eat. It's also slightly less sweet than some versions. If you're very, very short of time, you may like to know that it's possible to pre-crush the packet of biscuits with the full tin of condensed milk while you're stopped at the lights. Also, if you don't have quite enough biscuits, add a little more coconut. Or use less butter. If you're reading this while running to the shops, a 200g packet of dried cranberries will give you enough for the base and the topping, while a 250g block of Whittaker's white chocolate will fulfill all your chocolate needs.
100g butter
1/2 a tin (about 3/4 cup) condensed milk
300g plain sweet biscuits, bashed to large crumbs (keep a few big pieces in there for texture)
1 cup desiccated coconut
125g white chocolate, roughly chopped
zest of an orange
1 cup dried cranberries
125g white chocolate, roughly chopped
For the icing:
125g white chocolate
50g butter
1 cup icing sugar
juice of an orange (use the one you zested above)
1/2 cup dried cranberries
Line a 20 x 25cm tin (or thereabouts) with baking paper, leaving enough overhanging the sides that you can use to pull it out later.
Melt the butter and condensed milk together over low heat in a large pot. Let cool briefly, then tip in the biscuits, coconut, most of the orange zest, cranberries and chocolate. Stir to mix, then tip into the prepared tin. Press down (the overhanging paper will help here) to smooth the top. Put in the freezer.
Use the same pot to make the icing. Melt the butter and white chocolate over very, very low heat. Sift in the icing sugar and stir well, then squeeze in a little orange juice at a time until it forms a thick, spreadable mixture. Pour over the biscuit base, then sprinkle the cranberries and reserved orange zest on top. Return to the freezer for 5-10 minutes before slicing and racing out the door.
If your life is more leisurely, let the icing set in the fridge before slicing. Store in an airtight container in the fridge.
Now, I know I could have ignored the cake stall request, or I could have been more organised and done it a few days in advance. But I didn't do either of those things. Instead, I whipped up this slab of deliciousness in 20 minutes, while concurrently making boiled eggs for dinner and getting the child in and out of the bath. We then made it to the show on time, and all the lovely mothers (it's always mothers, isn't it?) who are so good they even RUN THE CAKESTALL cooed over the slice and wanted the recipe. In that moment, I felt a little bit less like a failure and more like a contributing member of society, even if my child was appearing in the show with a whopper of a black eye. But that's another story.
Chunky white choc, orange and cranberry slice
There are a zillion versions of this slice and the world probably doesn't need another one, but if you have weeks where the wheels are coming off and yet you still need to 'bake', this will save your bacon. Or bakin'. Or something.
Anyway, this version is better than all the others because it's big and chunky, and therefore more satisfying to eat. It's also slightly less sweet than some versions. If you're very, very short of time, you may like to know that it's possible to pre-crush the packet of biscuits with the full tin of condensed milk while you're stopped at the lights. Also, if you don't have quite enough biscuits, add a little more coconut. Or use less butter. If you're reading this while running to the shops, a 200g packet of dried cranberries will give you enough for the base and the topping, while a 250g block of Whittaker's white chocolate will fulfill all your chocolate needs.
100g butter
1/2 a tin (about 3/4 cup) condensed milk
300g plain sweet biscuits, bashed to large crumbs (keep a few big pieces in there for texture)
1 cup desiccated coconut
125g white chocolate, roughly chopped
zest of an orange
1 cup dried cranberries
125g white chocolate, roughly chopped
For the icing:
125g white chocolate
50g butter
1 cup icing sugar
juice of an orange (use the one you zested above)
1/2 cup dried cranberries
Line a 20 x 25cm tin (or thereabouts) with baking paper, leaving enough overhanging the sides that you can use to pull it out later.
Melt the butter and condensed milk together over low heat in a large pot. Let cool briefly, then tip in the biscuits, coconut, most of the orange zest, cranberries and chocolate. Stir to mix, then tip into the prepared tin. Press down (the overhanging paper will help here) to smooth the top. Put in the freezer.
Use the same pot to make the icing. Melt the butter and white chocolate over very, very low heat. Sift in the icing sugar and stir well, then squeeze in a little orange juice at a time until it forms a thick, spreadable mixture. Pour over the biscuit base, then sprinkle the cranberries and reserved orange zest on top. Return to the freezer for 5-10 minutes before slicing and racing out the door.
If your life is more leisurely, let the icing set in the fridge before slicing. Store in an airtight container in the fridge.
Labels:
Baking,
Chocolate,
Family,
Good Things,
New Zealand,
Party,
Pudding,
Recipes,
Treats
Posted by
Unknown
at
13:02
4 comments:
Monday, December 14, 2015
Roadtest: The Zoku Quick Pop Maker
"Mu-umm," she says, bedraggled and worn-out at the end of a busy day at school. "I'm very hot and bothered. Do you think it's a good day to have an iceblock?"
This is what's known as parental roulette. Say yes, and you've got a 10-minute walk to the village, followed by a five-minute high, which will not be enough to get you all the way home again. Say no, and you get a stompy six-year-old who is less than impressed with your suggestion that a nice glass of cold water when you get home will help her cool down.
After roadtesting the Zoku Quick Pop Maker, I may have found the solution.
Zoku's Quick Pop Makers are benchtop instant freezing units. You keep them in your freezer (the three-pop maker takes up about the same amount of space as a two-litre ice cream container), then whip them out to make DIY ice 'pops' (that's ice blocks to Kiwis and ice lollies to the British) in less than 10 minutes. You can make them as simple or as fancy as you like (Zoku even have a dazzling recipe book full of inspiring ideas) and - best of all - you get to control exactly what goes into them. We made the Mint Choc Chip Pops from the recipe book, using organic whole milk, agave nectar, peppermint essence and Whittaker's 72 per cent cacao chocolate - and they were fabulous.
Sound too good to be true? After some spectacular failures when trying to make homemade pops the normal way (I find they never, ever come out of the molds cleanly enough), I was very skeptical. But the Zoku worked an absolute charm. You release the pops with the aid of the 'Quick Tool' (included in each kit) and it's a mostly angst-free process. The pops are ready to eat then and there, but you can carefully wrap them in plastic and return them to the freezer to eat another day.
On the downside, they're not completely instant. The unit has to be frozen for 24 hours before you use it, and it's only good for two or three batches in a sitting. I found the second and third batches took a lot longer to freeze - and for the third, I actually returned the whole unit to the freezer for half an hour to make sure they set properly. You also need to wait for it to defrost before you clean it.
All things considered though, it's a pretty fun addition to the kitchen. A Quick Pop Maker would also make a fantastic family Christmas present for the people with everything. If you're going to buy your children a device of some kind, at least get them one that encourages real-time social interaction!
THE DETAILS
Zoku Quick Pop Makers come in three sizes - single (RRP $49.99), duo and triple (RRP $110). Each comes with a Quick Tool, sticks and drip guards, plus instructions. Find New Zealand stockists here.
GIVEAWAY
Want to win a Quick Pop Maker? Check out The Kitchenmaid on Facebook for your chance to win one!
This is what's known as parental roulette. Say yes, and you've got a 10-minute walk to the village, followed by a five-minute high, which will not be enough to get you all the way home again. Say no, and you get a stompy six-year-old who is less than impressed with your suggestion that a nice glass of cold water when you get home will help her cool down.
After roadtesting the Zoku Quick Pop Maker, I may have found the solution.
Zoku's Quick Pop Makers are benchtop instant freezing units. You keep them in your freezer (the three-pop maker takes up about the same amount of space as a two-litre ice cream container), then whip them out to make DIY ice 'pops' (that's ice blocks to Kiwis and ice lollies to the British) in less than 10 minutes. You can make them as simple or as fancy as you like (Zoku even have a dazzling recipe book full of inspiring ideas) and - best of all - you get to control exactly what goes into them. We made the Mint Choc Chip Pops from the recipe book, using organic whole milk, agave nectar, peppermint essence and Whittaker's 72 per cent cacao chocolate - and they were fabulous.
Sound too good to be true? After some spectacular failures when trying to make homemade pops the normal way (I find they never, ever come out of the molds cleanly enough), I was very skeptical. But the Zoku worked an absolute charm. You release the pops with the aid of the 'Quick Tool' (included in each kit) and it's a mostly angst-free process. The pops are ready to eat then and there, but you can carefully wrap them in plastic and return them to the freezer to eat another day.
On the downside, they're not completely instant. The unit has to be frozen for 24 hours before you use it, and it's only good for two or three batches in a sitting. I found the second and third batches took a lot longer to freeze - and for the third, I actually returned the whole unit to the freezer for half an hour to make sure they set properly. You also need to wait for it to defrost before you clean it.
All things considered though, it's a pretty fun addition to the kitchen. A Quick Pop Maker would also make a fantastic family Christmas present for the people with everything. If you're going to buy your children a device of some kind, at least get them one that encourages real-time social interaction!
THE DETAILS
Zoku Quick Pop Makers come in three sizes - single (RRP $49.99), duo and triple (RRP $110). Each comes with a Quick Tool, sticks and drip guards, plus instructions. Find New Zealand stockists here.
GIVEAWAY
Want to win a Quick Pop Maker? Check out The Kitchenmaid on Facebook for your chance to win one!
Tuesday, May 12, 2015
How to fake a wedding cake
This is the wedding cake that nearly wasn't.
When one of my oldest and dearest friends announced she was getting married, I immediately offered to make the wedding cake. She accepted the offer and that was that.
When their wedding was delayed to May, I breathed a sigh of relief and put the cake on the back burner.
Then all of a sudden it was April, the bride was talking multiple layers, chocolate ganache, and the merits of chocolate mud versus chocolate and fig, I had a million other things on my mind and I was lying awake at night, panicking about The Cake.
It was then I remembered that I'd been in this situation before. Five years ago, with a small baby and ideas above my station, I offered to make the wedding cake for some dear friends who'd blown into New Zealand from London to get married.
"Oh yes please," they said. "Don't go to any trouble, but we'd like it to have three layers and have licorice allsorts exploding out the top."
Making the cakes - one chocolate and fig, one chocolate mud and one banana (the groom's favourite flavour) - was easy. Doing the decorating was not. Not for the first time, I recalled a school report in which my teacher said I was often frustrated when my grand plans for artworks didn't come to fruition. I handed the baby to my mother-in-law and spent 24 hours wrestling with kilos of white fondant icing, alternating between wanting to cry and wanting to cheer.
On the afternoon of the wedding, my beloved and I balanced the cake on our knees while my father-in-law drove as slowly as he could around corners. We screamed every time the cake lurched towards my silk dress, more for the sake of the cake than my outfit. By the time we got to the venue the cake had several dents in it and I needed a strong drink to settle my nerves.
It nearly killed me, but the lovely bride and groom were happy and lots of guests said nice things about the cake. Still, I swore that it was the last time I would ever do it.
With those memories flooding back, I rang the bride. "I can't do it," I told her. "I'm too afraid it will be a disaster and you'll be even more disappointed in me than you feel right now."
Like the good friend she is, she took this news on the chin. Instead of making the cake, I decided to redefine my role as chief cake wrangler. I set about getting cake quotes and set up a wedding cake Pinterest board to gather ideas. When they baulked at the quotes - a two or three tier wedding cake is in the region of $400-$500 - I came up with plan B.
Instead of requesting a wedding cake, I asked Pandoro Bakery to make us two large cakes - one a 14" Black Doris Plum Chocolate, the other a 10" Mediterranean Orange, which they present on gold foil cake boards. I got them to ice them identically with chocolate ganache, with the sides rolled in white chocolate shavings.
The day before the wedding, my fellow bridesmaid and I picked them up and took them on a two-hour car ride (mercifully, on very straight roads).
Later that night, the groom helped me engineer the two together, inserting dowel rods to keep the top layer from collapsing into the bottom. With no storage option, we carefully manoeuvred the cake into a beer fridge and prayed it would survive the night.
The next morning, I returned to the venue, rescued the cake from the fridge and plopped some white roses on top. Just like that, the job was done.
The cake looked beautiful, my 22-year friendship with the bride is still intact and my mental health is sound. I may never make a special occasion cake again.
Are you prone to making special occasion cake promises? Do you have any secret tips?
When one of my oldest and dearest friends announced she was getting married, I immediately offered to make the wedding cake. She accepted the offer and that was that.
When their wedding was delayed to May, I breathed a sigh of relief and put the cake on the back burner.
Then all of a sudden it was April, the bride was talking multiple layers, chocolate ganache, and the merits of chocolate mud versus chocolate and fig, I had a million other things on my mind and I was lying awake at night, panicking about The Cake.
It was then I remembered that I'd been in this situation before. Five years ago, with a small baby and ideas above my station, I offered to make the wedding cake for some dear friends who'd blown into New Zealand from London to get married.
"Oh yes please," they said. "Don't go to any trouble, but we'd like it to have three layers and have licorice allsorts exploding out the top."
Making the cakes - one chocolate and fig, one chocolate mud and one banana (the groom's favourite flavour) - was easy. Doing the decorating was not. Not for the first time, I recalled a school report in which my teacher said I was often frustrated when my grand plans for artworks didn't come to fruition. I handed the baby to my mother-in-law and spent 24 hours wrestling with kilos of white fondant icing, alternating between wanting to cry and wanting to cheer.
On the afternoon of the wedding, my beloved and I balanced the cake on our knees while my father-in-law drove as slowly as he could around corners. We screamed every time the cake lurched towards my silk dress, more for the sake of the cake than my outfit. By the time we got to the venue the cake had several dents in it and I needed a strong drink to settle my nerves.
It nearly killed me, but the lovely bride and groom were happy and lots of guests said nice things about the cake. Still, I swore that it was the last time I would ever do it.
With those memories flooding back, I rang the bride. "I can't do it," I told her. "I'm too afraid it will be a disaster and you'll be even more disappointed in me than you feel right now."
Like the good friend she is, she took this news on the chin. Instead of making the cake, I decided to redefine my role as chief cake wrangler. I set about getting cake quotes and set up a wedding cake Pinterest board to gather ideas. When they baulked at the quotes - a two or three tier wedding cake is in the region of $400-$500 - I came up with plan B.
Instead of requesting a wedding cake, I asked Pandoro Bakery to make us two large cakes - one a 14" Black Doris Plum Chocolate, the other a 10" Mediterranean Orange, which they present on gold foil cake boards. I got them to ice them identically with chocolate ganache, with the sides rolled in white chocolate shavings.
The day before the wedding, my fellow bridesmaid and I picked them up and took them on a two-hour car ride (mercifully, on very straight roads).
Later that night, the groom helped me engineer the two together, inserting dowel rods to keep the top layer from collapsing into the bottom. With no storage option, we carefully manoeuvred the cake into a beer fridge and prayed it would survive the night.
The next morning, I returned to the venue, rescued the cake from the fridge and plopped some white roses on top. Just like that, the job was done.
The cake looked beautiful, my 22-year friendship with the bride is still intact and my mental health is sound. I may never make a special occasion cake again.
Are you prone to making special occasion cake promises? Do you have any secret tips?
Labels:
Baking,
Cake,
Chocolate,
DIY,
Good Things,
New Zealand,
Party,
Pudding,
Storecupboard secrets,
Wellington
Posted by
Unknown
at
19:56
12 comments:
Friday, February 06, 2015
Raw beetroot bliss balls
A dear friend of mine calls herself an alternative eater - wholefoods, no meat, no refined sugar, the whole kit and kaboodle. While that makes her a rather challenging dinner guest, she's also one of the most appreciative people a cook could hope to create for. After I got over feeling daunted by her request for a birthday cake last weekend - especially one that could withstand a car journey and an afternoon in the sun - I had a burst of inspiration and these pretty-in-pink bliss balls were the result.
Raw beetroot bliss balls - for Catherine
You don't have to be an alternative eater to love these. In fact, you don't even have to like beetroot. Soaking the almonds makes them easier to whizz up.
1 cup loosely packed grated beetroot
1 cup dates
1 cup dates
1 /2 cup whole almonds
1/2 cup roughly chopped best quality dark chocolate or cacao nibs, optional
1/2 cup desiccated coconut, plus about 3/4 cup for rolling
Put the dates and almonds in a small heatproof bowl and cover with boiling water. Set aside for 15 minutes, then drain.
Tip the beetroot into a food processor and whiz until finely chopped. Add the drained dates and almonds, the chocolate (if using) and the 1/2 cup measure of coconut. Whizz until it clumps together.
Put the second measure of coconut into a shallow bowl. Form teaspoonfuls of the mixture into balls, then roll in the coconut. Store in the fridge. Makes around 36 small balls.
Have a great weekend, everyone x
Labels:
Cake,
Chocolate,
Family,
Gluten-free,
Nutrition,
Party,
Picnic,
Pudding,
Raw,
Recipes,
Treats,
Vegan,
Vegetables,
Wellington
Posted by
Unknown
at
07:58
10 comments:
Wednesday, December 31, 2014
Sparkling berry brandy cocktails
Someone asked me the other day what has been my greatest achievement of 2014. In the absence of anything else, I've finally decided that keeping going this year has been achievement enough. Thank you dear readers for your continued support. May 2015 be full of 'great achievements' (whatever you think they are) for all of us.
In the meantime, here's a small, recent achievement - summer in a glass. Think of this as the Kiwi Pimm's...
Sparkling berry brandy cocktails
This is a good way to turn a bottle of Lindauer into something more special. The first person I served it to commented that 'the strawberries hide the taste of the alcohol'. I didn't have the heart to tell him about the brandy...
2 Tbsp brandy
1 Tbsp icing sugar
2/3 cup sliced strawberries
1 bottle of your best sparkling wine
Put the brandy and icing sugar in a small bowl and mix well. Add the strawberries and stir. Set aside (this can be done several hours in advance if you like). To serve, divide this mixture between six champagne flutes and top with sparkling wine.
Happy New Year, everyone. See you in 2015.
Tuesday, November 18, 2014
Chilli chocolate syrup + a chilli chocolate martini
It's about this time of year that I start to feel slightly panicked and wish I could run away to some kind of closed community where they don't celebrate Christmas, or have jobs, or blogs or Things To Worry About. Do you feel like that too?
The internet is the worst place to be if you're in that kind of mood, because CHRISTMAS is around every turn. Don't, whatever you do, venture on to Pinterest, or you'll fall into a deep depression at the realisation that you've failed dismally as a mother/partner/sibling/friend/member of society because you haven't planned your themed decorations, hand-stitched jaunty bunting or made 20 sets of Frozen-themed figurines of every kid in your child's class from air-dried clay. And you've still got to bake for the school gala, sort your invoices, locate the spare car key and send your dear friend her birthday present, now three months overdue (sorry Claire!).
Fear not, friends, because I have a remedy to lift you to a higher place. It's chocolate chilli syrup - and if pouring it over cake or ice cream doesn't cheer you up, then adding it to a martini certainly will. Here's how.
Chocolate chilli syrup
If you're stuck for easy DIY Christmas gifts, this should go on the list. It takes minutes, doesn't cost much and is extremely simple. It's my offering for this month's We Should Cocoa challenge, hosted by the lovely Shaheen of Allotment2Kitchen. No surprises in guessing this month's guest ingredient - it's chilli.
1 cup water
1 cup caster sugar
3 Tbsp good quality cocoa powder
1 tsp chilli flakes
Stir the sugar and cocoa together in a small pot, then add the water and mix well. Bring to the boil and let simmer for five minutes, then remove from heat. Stir in the chilli and let cool to room temperature. Strain through a fine sieve into a jar or bottle and cover tightly. Store in the fridge.
Chocolate chilli martini
Martini purists, look away now - this is very much my desperate housewife interpretation.
60ml ice cold vodka
30ml vermouth
30ml chilli chocolate syrup
ice
Put all ingredients in a cocktail shaker (confession: I use a jam jar) and shake well. Strain into a martini glass (or two, if you're generous).
Labels:
Blogs,
Cake,
Chocolate,
Christmas,
DIY,
Drinks,
Gluten-free,
Guilty Pleasures,
Party,
Pudding,
Recipes,
Storecupboard secrets,
Treats,
Vegan,
Vegetables,
We Should Cocoa
Posted by
Unknown
at
20:59
6 comments:
Monday, August 18, 2014
Ambrosia, food of the gods
If you grew up in New Zealand in the 1970s and 1980s, there's a good chance this pudding will be instantly recognisable. If not, it's high time you got acquainted.
This is ambrosia, food of the gods. I remember it sweeping through parties and social occasions of my childhood like a tidal wave of cream, fruit and pineapple lumps. My mother never made it, which gave it extra cachet. To my 10-year-old self, ambrosia was just about the most glamorous pudding ever invented.
Thirty years later, I can vouch for many of its attributes. The mixture of cream and yoghurt is still tangy and rich, and it's great fun anticipating the surprise in each mouthful - will it be a marshmallow or a juicy berry? I doubt it's the food of the modern gods, given its extremely calorific ingredients, but it still makes a great pudding (or a very illicit breakfast).
Ambrosia
The great thing about ambrosia is that it doesn't require any fancy ingredients, can be made for an intimate dinner for two or a feeding frenzy for 20 and it appeals to just about everyone. Children adore it and adults, though they pretend they are too grown up to eat marshmallows, will dig into the bowl as soon as your back is turned. It's sort of an Antipodean Eton Mess, which makes it the perfect entry for this month's Sweet New Zealand blogging challenge. This month my lovely friends Michelle and Anna of Munch Cooking are playing host and they've given it a Wellington theme to celebrate Wellington On a Plate. It's also a fitting entry for the August edition of We Should Cocoa, in which guest host Rebecca of BakeNQuilt has chosen marshmallows as the special guest ingredient.
180ml (3/4 cup) cream
2 cups natural yoghurt (I particularly like The Collective's Straight Up yoghurt in this)
1 tsp pure vanilla extract
2 cups frozen berries - blueberries, raspberries, boysenberries, blackberries
2 cups mini marshmallows
100g chocolate, roughly chopped
Whip the cream until it forms soft peaks. Stir through the yoghurt and vanilla, then fold through the berries, marshmallows and chocolate (reserve a little of the chocolate to sprinkle on top). Cover and chill for at least 30 minutes before serving. I think it's best the day it's made, unless you're eating it sneakily for breakfast the morning after. Serves 4-6.
Have a great week, everyone x
Labels:
Blogs,
Breakfast,
Chocolate,
Gluten-free,
Guilty Pleasures,
Party,
Pudding,
Recipes,
Storecupboard secrets,
Sweet New Zealand,
We Should Cocoa,
Wellington
Posted by
Unknown
at
20:00
14 comments:
Friday, April 04, 2014
Treat me: Homemade Easter eggs
I'm not really that keen on sweets or lollies, but it takes a lot of willpower for me to resist a marshmallow. This has been a lifelong problem - when I was about five I discovered a stash of marshmallows in a high cupboard and secretly scoffed the lot. I still remember the speech I got about how it was bad to take the marshmallows, but even worse to lie and pretend I hadn't. I've been a terrible liar ever since (and still feel guilty about indulging my marshmallow habit.)
Last weekend my friend Agnes came over and made a swag of beautiful Easter eggs while I found whatever kitchen tool she needed and kept our daughters out of the chocolate (one of those tasks was much easier than the other). Agnes and chocolate are like Picasso and paint - it's amazing watching her work. I was too embarrassed to make these eggs - the way I remember doing them with my mother - in front of her, but my taste for nostalgia (and marshmallow) meant I've been dreaming about them all week.
So if you've ever wondered how to make marshmallow Easter eggs at home without any fancy kit, this is how to do it.
Homemade Marshmallow Easter Eggs
Don't be alarmed - the flour and egg are only used in the shaping process. Both can be reused in the normal way. You need electric beaters, or preferably a stand mixer, to make the marshmallow. Don't attempt it with a rotary beater, it will only end in tears. This is a bit of a process but the results, which taste like chocolate-covered clouds, make it all worth it.
2 kg flour (use gluten-free flour if you have gluten woes)
1 egg - at room temperature (or the flour sticks to it)
1 Tbsp powdered gelatine
1/4 cup cold water
1/2 cup hot water
1 cups sugar
1/2 tsp pure vanilla
1/2 tsp rosewater
1 tsp lemon juice
Pink food colouring, optional
180g good quality chocolate - I used Whittaker's Fairtrade Creamy Milk
1 Tbsp coconut oil or other plain, flavourless oil
Spread the flour into two or three large, deep baking dishes. The flour needs to be about 5cm deep. Gently press the egg (in the shell) into the flour to make a half-egg shape to make 20 hollows. Carefully set aside.
Put the cold water in a small bowl and sprinkle over the gelatine. Stir well, then let swell for five minutes.
Put the hot water and the sugar in a large saucepan and stir over low heat until the sugar is dissolved. Add the gelatine mixture, stirring all the time, until it has dissolved too.
Bring this mixture to the boil and boil gently for six minutes. Remove from the heat and let cool until lukewarm.
Transfer it to a large mixing bowl (or the bowl of a stand mixer) and add the vanilla, rosewater and lemon juice. Beat on high speed until thick and creamy (about five minutes, depending on your mixer). If you like, add a few drops of pink food colouring when the mixture is nearly done.
Carefully spoon the marshmallow mixture into the egg shapes, making sure it comes to the top.
Let set for 15 minutes, then carefully remove the halves from the flour by touching the top of each one with your finger and lifting it out. Join the halves together (the top stays sticky, so they 'glue' together nicely) and dust off the flour. A pastry brush is helpful here.
Cover a tray with plastic wrap and set aside.
Leave the marshmallow eggs in a cool place while you melt the chocolate and coconut oil together in a double boiler over low heat. Let cool until lukewarm, then carefully dip the eggs in, using a fork or a dipping spoon, then put them on the plastic-covered tray. This is a messy job - just resign yourself to the fact that chocolate will go everywhere. When the eggs are covered (or as best as you can get them), put them in the fridge to set. Store them in a covered container in the fridge (wrap them in foil if you're really fancy). Makes 8-10 eggs, depending on how much marshmallow you eat in the process...
Given that this is such a chocolate-filled time of the year (in our house, at least), it makes great sense to add this post to April's We Should Cocoa challenge, where guest host Rachel Cotterill has chosen Easter as the theme.
Have a great weekend everyone x
Last weekend my friend Agnes came over and made a swag of beautiful Easter eggs while I found whatever kitchen tool she needed and kept our daughters out of the chocolate (one of those tasks was much easier than the other). Agnes and chocolate are like Picasso and paint - it's amazing watching her work. I was too embarrassed to make these eggs - the way I remember doing them with my mother - in front of her, but my taste for nostalgia (and marshmallow) meant I've been dreaming about them all week.
So if you've ever wondered how to make marshmallow Easter eggs at home without any fancy kit, this is how to do it.
Homemade Marshmallow Easter Eggs
Don't be alarmed - the flour and egg are only used in the shaping process. Both can be reused in the normal way. You need electric beaters, or preferably a stand mixer, to make the marshmallow. Don't attempt it with a rotary beater, it will only end in tears. This is a bit of a process but the results, which taste like chocolate-covered clouds, make it all worth it.
2 kg flour (use gluten-free flour if you have gluten woes)
1 egg - at room temperature (or the flour sticks to it)
1 Tbsp powdered gelatine
1/4 cup cold water
1/2 cup hot water
1 cups sugar
1/2 tsp pure vanilla
1/2 tsp rosewater
1 tsp lemon juice
Pink food colouring, optional
180g good quality chocolate - I used Whittaker's Fairtrade Creamy Milk
1 Tbsp coconut oil or other plain, flavourless oil
Spread the flour into two or three large, deep baking dishes. The flour needs to be about 5cm deep. Gently press the egg (in the shell) into the flour to make a half-egg shape to make 20 hollows. Carefully set aside.
Put the cold water in a small bowl and sprinkle over the gelatine. Stir well, then let swell for five minutes.
Put the hot water and the sugar in a large saucepan and stir over low heat until the sugar is dissolved. Add the gelatine mixture, stirring all the time, until it has dissolved too.
Bring this mixture to the boil and boil gently for six minutes. Remove from the heat and let cool until lukewarm.
Transfer it to a large mixing bowl (or the bowl of a stand mixer) and add the vanilla, rosewater and lemon juice. Beat on high speed until thick and creamy (about five minutes, depending on your mixer). If you like, add a few drops of pink food colouring when the mixture is nearly done.
Carefully spoon the marshmallow mixture into the egg shapes, making sure it comes to the top.
Let set for 15 minutes, then carefully remove the halves from the flour by touching the top of each one with your finger and lifting it out. Join the halves together (the top stays sticky, so they 'glue' together nicely) and dust off the flour. A pastry brush is helpful here.
Cover a tray with plastic wrap and set aside.
Leave the marshmallow eggs in a cool place while you melt the chocolate and coconut oil together in a double boiler over low heat. Let cool until lukewarm, then carefully dip the eggs in, using a fork or a dipping spoon, then put them on the plastic-covered tray. This is a messy job - just resign yourself to the fact that chocolate will go everywhere. When the eggs are covered (or as best as you can get them), put them in the fridge to set. Store them in a covered container in the fridge (wrap them in foil if you're really fancy). Makes 8-10 eggs, depending on how much marshmallow you eat in the process...
Given that this is such a chocolate-filled time of the year (in our house, at least), it makes great sense to add this post to April's We Should Cocoa challenge, where guest host Rachel Cotterill has chosen Easter as the theme.
Have a great weekend everyone x
Labels:
Chocolate,
Easter,
eggs,
Gluten-free,
Party,
Pudding,
Recipes,
Treats,
We Should Cocoa
Posted by
Unknown
at
21:00
10 comments:
Friday, March 28, 2014
Treat me: Marshmallow nests
I was out the other night and someone I hadn't seen for a long time said to me, apropos of something else, 'it's lucky you're not a proper journalist because...'. Reader, I was mortally wounded.
I was also slightly lost for words, but I realised afterwards I could have come back with a whole lot of reasons of why I AM still a proper journalist. At the time though, I could only think of this one: that I can still eavesdrop on a conversation across the other side of the room while staying engaged in the one I'm having. That's a proper journalist skill, that is. Trust me. You don't spend ages listening to the police scanner while being shouted at by the chief reporter and keeping abreast of office gossip for nothing, you know.
Anyway, because I'm not a 'proper journalist' any more I now have to practice this skill at things like kids' birthday parties - which is where I picked up the first part of this recipe. Two women across the party table were discussing rice bubble cake and I heard the other one say, 'no, no, you should do it with 50g of butter and a packet of marshmallows'. Then the conversation I was in got interesting again and I tuned the rice bubble ladies out. Still, it was enough. All you need is a lead, after all.
Marshmallow Nests
I urge you to suspend your disbelief for a minute and try these - they are absolutely addictive. Trust me, I had to leave the house to stop myself eating the whole batch this morning (it's been that kind of week). This makes 12 mini nests, but if you want to make more I suggest making up a new batch rather than doubling the recipe as the mixture starts to set quite quickly. If you have a silicon mini muffin tin, now is the time to use it.
125g marshmallows - the little ones melt faster, but the big ones are fine to use
25g unsalted butter
2 cups rice bubbles
about 36 mini marshmallows, for decorating
Put the butter and marshmallows in a medium saucepan and set over low heat. Stir frequently until the marshmallows are melted and the whole thing is a spooky looking mess. Remove from heat, then tip in the rice bubbles and stir until well combined.
Divide the mixture between the 12 holes of a mini muffin tin (or a small tartlet tin), then, using your fingers and a wet spoon, hollow out the middle to make a nest shape.
Let cool and set (about 10 minutes), then remove the nests from the tin and arrange a few mini marshmallows in each nest. Store in an airtight container in a cool, dark place (but not the fridge, they get too sticky).
Have a great weekend, everyone x
I was also slightly lost for words, but I realised afterwards I could have come back with a whole lot of reasons of why I AM still a proper journalist. At the time though, I could only think of this one: that I can still eavesdrop on a conversation across the other side of the room while staying engaged in the one I'm having. That's a proper journalist skill, that is. Trust me. You don't spend ages listening to the police scanner while being shouted at by the chief reporter and keeping abreast of office gossip for nothing, you know.
Anyway, because I'm not a 'proper journalist' any more I now have to practice this skill at things like kids' birthday parties - which is where I picked up the first part of this recipe. Two women across the party table were discussing rice bubble cake and I heard the other one say, 'no, no, you should do it with 50g of butter and a packet of marshmallows'. Then the conversation I was in got interesting again and I tuned the rice bubble ladies out. Still, it was enough. All you need is a lead, after all.
Marshmallow Nests
I urge you to suspend your disbelief for a minute and try these - they are absolutely addictive. Trust me, I had to leave the house to stop myself eating the whole batch this morning (it's been that kind of week). This makes 12 mini nests, but if you want to make more I suggest making up a new batch rather than doubling the recipe as the mixture starts to set quite quickly. If you have a silicon mini muffin tin, now is the time to use it.
125g marshmallows - the little ones melt faster, but the big ones are fine to use
25g unsalted butter
2 cups rice bubbles
about 36 mini marshmallows, for decorating
Put the butter and marshmallows in a medium saucepan and set over low heat. Stir frequently until the marshmallows are melted and the whole thing is a spooky looking mess. Remove from heat, then tip in the rice bubbles and stir until well combined.
Divide the mixture between the 12 holes of a mini muffin tin (or a small tartlet tin), then, using your fingers and a wet spoon, hollow out the middle to make a nest shape.
Let cool and set (about 10 minutes), then remove the nests from the tin and arrange a few mini marshmallows in each nest. Store in an airtight container in a cool, dark place (but not the fridge, they get too sticky).
Have a great weekend, everyone x
Labels:
Family,
Gluten-free,
Guilty Pleasures,
Party,
Pudding,
Recipes
Posted by
Unknown
at
19:27
10 comments:
Saturday, February 15, 2014
Treat me: Chocolate Cornflake Roughs
Some things are made for each other. Salt and caramel. Champagne and oysters. Walnuts and blue cheese. Chocolate and coconut. Then there's Random Recipes and We Should Cocoa - a match so perfect I can't believe they haven't joined forces before.
For this month's Random-Recipes-Meets-We-Should-Cocoa mash-up I had a very limited selection of books to choose from thanks to our ongoing renovations (it's hard to access the main part of one's cookbook collection when it's hidden behind a king-sized bed, two radiators and a mirror, don't you think?). Anyway, one of the few books I could reach was this handsome tome: a 1971 edition of The New Zealand Woman's Weekly Cookbook, edited by the incomparable Tui Flower.
Like Random Recipes maestro Dominic, and We Should Cocoa founder Choclette, Tui Flower is a force to be reckoned with. She ruled New Zealand food writing from her test kitchen at the NZ Woman's Weekly for more than 20 years. At the NZ Guild of Food Writers' Conference last November she was spoken of with the utmost awe, if not a slight touch of fear.
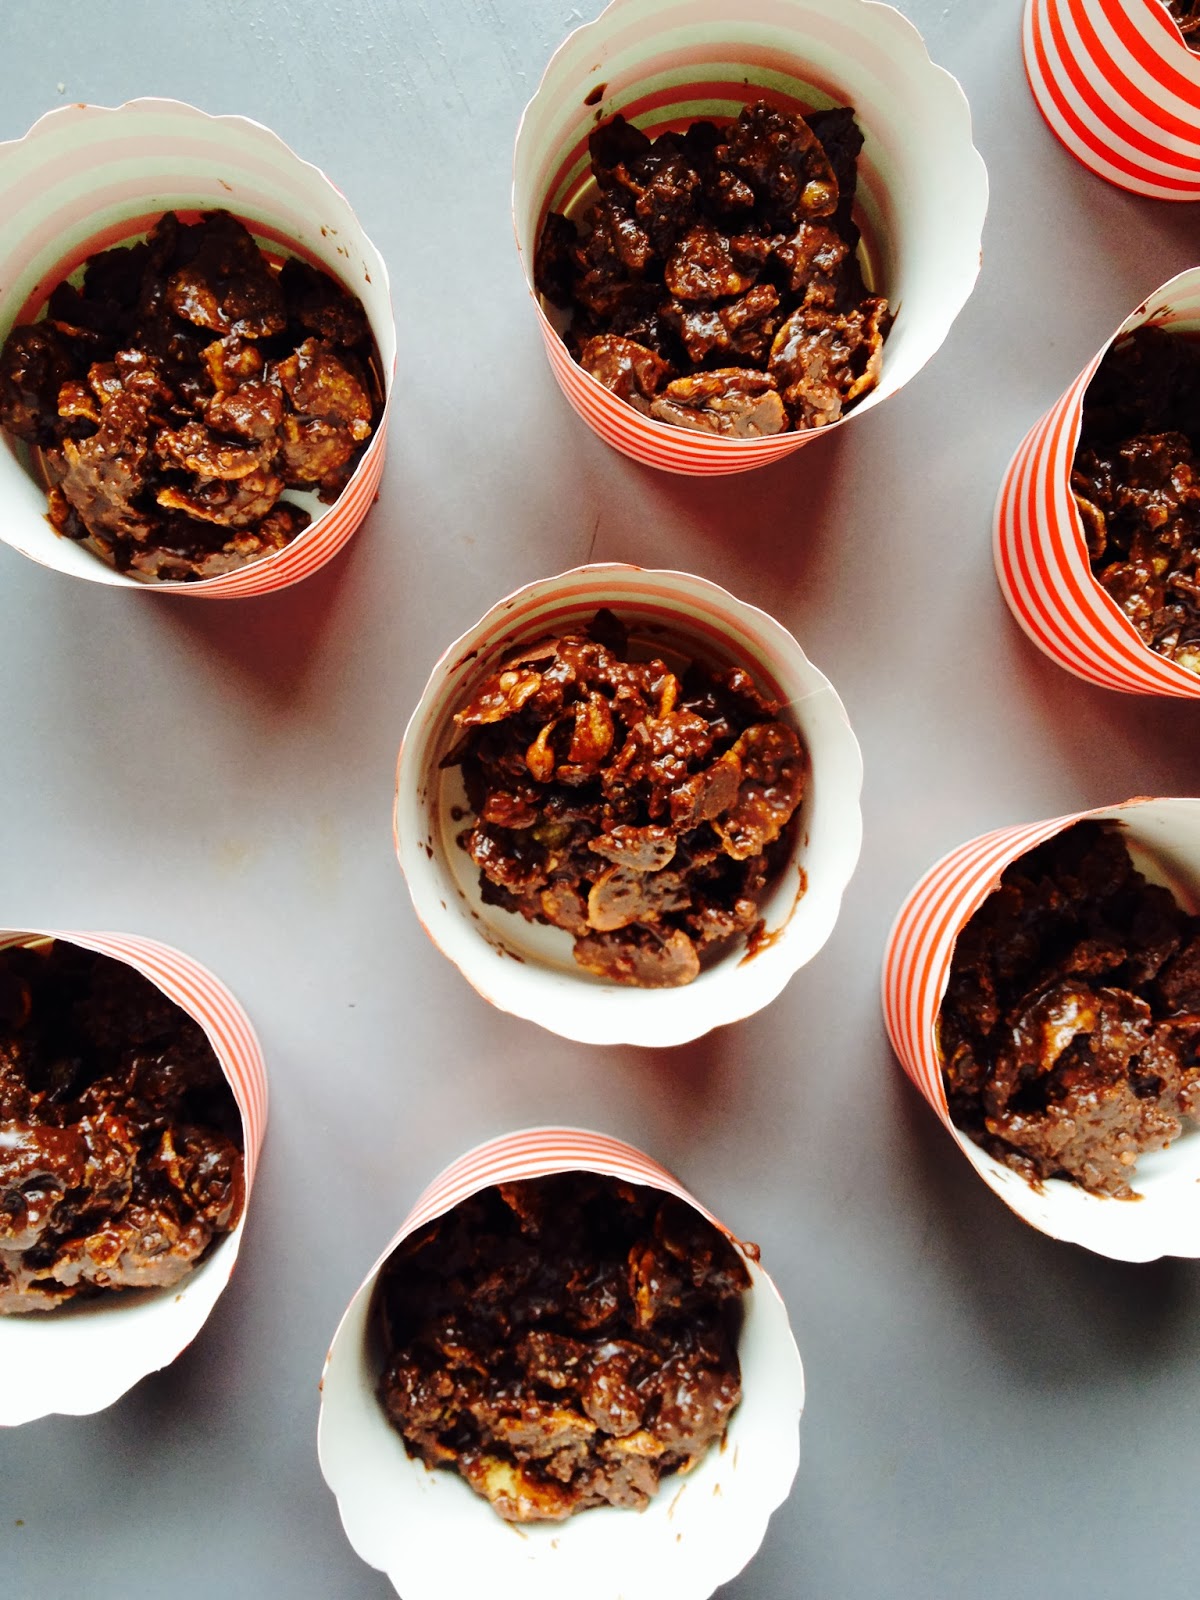
This book, though a little dated in parts, is a brilliant snapshot of New Zealand households in the 70s (and beyond). I rescued my copy from an charity shop and - while I'm unlikely to make Tui's recipe for 'Picnic Loaf' using a tin of spaghetti and sausages, among other things - I think it's a fine piece of culinary heritage. The recipe I ended up with here is another local icon. Chocolate Cornflake Roughs, or their close cousins, made with rice bubbles, were THE party food of choice when I was a child. They are very sweet, crunchy and best served very cold (ideally, without any children to share them with).
Chocolate Cornflake Roughs
As much as I respect and admire the work of Tui Flower, I've updated her 1971 recipe to reflect the contents of a slightly more modern pantry. The original recipe specifies 'crushed coconut biscuits' - in New Zealand that can only mean the delectable Krispies (which now even come in a chocolate-dipped form). If you don't have a similar biscuit, I suggest something like a digestive or chocolate wheaten. Hey, you could even use these. If you're not a fan of coconut oil, any light, neutral oil will work. Don't forget to use the best cocoa you can for an especially rich flavour. For that birthday party touch, use cupcake cases instead of a lined tray.
1/2 cup icing sugar
3 Tbsp cocoa
90ml coconut oil, melted
a drop or two of almond essence
1 cup cornflakes
9 coconut biscuits (as described above), crushed to make about 1 cup of crumbs.
Line a tray or a large platter with baking paper and set aside.
Sift the icing sugar and cocoa together into a bowl. Beat in the coconut oil and almond essence, then add the cornflakes and biscuit crumbs and stir until well combined. Drop spooonfuls of the mixture on the lined tray and leave in a cool place to set. Makes about 12.
Have a great weekend, everyone!

For this month's Random-Recipes-Meets-We-Should-Cocoa mash-up I had a very limited selection of books to choose from thanks to our ongoing renovations (it's hard to access the main part of one's cookbook collection when it's hidden behind a king-sized bed, two radiators and a mirror, don't you think?). Anyway, one of the few books I could reach was this handsome tome: a 1971 edition of The New Zealand Woman's Weekly Cookbook, edited by the incomparable Tui Flower.
Like Random Recipes maestro Dominic, and We Should Cocoa founder Choclette, Tui Flower is a force to be reckoned with. She ruled New Zealand food writing from her test kitchen at the NZ Woman's Weekly for more than 20 years. At the NZ Guild of Food Writers' Conference last November she was spoken of with the utmost awe, if not a slight touch of fear.
This book, though a little dated in parts, is a brilliant snapshot of New Zealand households in the 70s (and beyond). I rescued my copy from an charity shop and - while I'm unlikely to make Tui's recipe for 'Picnic Loaf' using a tin of spaghetti and sausages, among other things - I think it's a fine piece of culinary heritage. The recipe I ended up with here is another local icon. Chocolate Cornflake Roughs, or their close cousins, made with rice bubbles, were THE party food of choice when I was a child. They are very sweet, crunchy and best served very cold (ideally, without any children to share them with).
Chocolate Cornflake Roughs
As much as I respect and admire the work of Tui Flower, I've updated her 1971 recipe to reflect the contents of a slightly more modern pantry. The original recipe specifies 'crushed coconut biscuits' - in New Zealand that can only mean the delectable Krispies (which now even come in a chocolate-dipped form). If you don't have a similar biscuit, I suggest something like a digestive or chocolate wheaten. Hey, you could even use these. If you're not a fan of coconut oil, any light, neutral oil will work. Don't forget to use the best cocoa you can for an especially rich flavour. For that birthday party touch, use cupcake cases instead of a lined tray.
1/2 cup icing sugar
3 Tbsp cocoa
90ml coconut oil, melted
a drop or two of almond essence
1 cup cornflakes
9 coconut biscuits (as described above), crushed to make about 1 cup of crumbs.
Line a tray or a large platter with baking paper and set aside.
Sift the icing sugar and cocoa together into a bowl. Beat in the coconut oil and almond essence, then add the cornflakes and biscuit crumbs and stir until well combined. Drop spooonfuls of the mixture on the lined tray and leave in a cool place to set. Makes about 12.
Have a great weekend, everyone!

Labels:
Baking,
Chocolate,
Family,
Guilty Pleasures,
Party,
Random Recipe,
Recipes,
Vegan,
We Should Cocoa
Posted by
Unknown
at
13:54
12 comments:
Monday, December 23, 2013
Last-minute chocolate fudge
If you are an organised person, you are probably sitting around shelling peas, roasting chesnuts on an open fire or performing some other seasonally appropriate cliched Christmas task. If you are not an organised person, you might be still at work, still asleep or still stuck in a line of traffic or angry shoppers.
If you fall somewhere in the middle, this post is for you. I thought I was an organised person, but then last week I was struck down by an evil virus (I'll spare you the details) that made juggling parenting, work and the onset of Christmas near impossible. If it wasn't for the miracle of online shopping and the fact that we are not hosting a Christmas feast (though I am cooking most of it), I think I would have cancelled the whole thing.
Now mostly recovered - and most importantly, with a mostly recovered child and a husband who is being force-fed vitamin tablets so he doesn't succumb to whatever we had - I am actually looking forward to The Big Day. Sure, I have to cook a turkey and a chocolate roulade and a panettone and introduce some salads to a family who looks suspiciously at any vegetable that isn't a deep-fried potato, but that's all doable. Even more doable is this incredibly easy fudge, which doesn't require any boiling or beating and can be made in an instant. If you are leaving all your Christmas shopping until the lastest of last minutes, don't put yourself through it. Just make a double batch of this stuff and you'll be regarded as a bona fide Christmas miracle.
Chocolate Almond Fudge
This recipe came to me from Tiny Happy, a blog so beautiful and serene that setting aside five minutes to read it is like giving yourself a little Christmas present every day. You can see Melissa's most recent post about the fudge here. Here's how I made it - with my time-honoured trick of using the oven as a chocolate melting device, because everyone's oven is on at this time of year, isn't it?
400g good quality dark chocolate (eg 200g Whittaker's 50 per cent and 200g Whittaker's 72 per cent chocolate, broken into pieces
1 400g tin of condensed milk
150g roasted salted almonds (or other nuts of your choice, or tangy dried fruit)
Melt the chocolate and condensed milk together - my favourite way to do this is to put it in a large heatproof bowl in a low oven (about 150C) for about 10 minutes. You could also do this in a double-boiler, or in a microwave, but the oven method is low stress and energy-efficient (if the oven has been on for something else, obviously). While this is happening, line a brownie pan or similar (about 30 x 20cm) with baking paper. Scatter half the nuts on the bottom of the tin.
As soon as the chocolate has melted, or nearly melted, take it out of the oven/double boiler and stir well until it's well mixed. Pour this mixture into the prepared tin and press the remaining nuts on top.
Put it in the fridge to set - this will happen very quickly - then slice into small squares or bars. If you're giving it away, make sure to tell the recipients to store it in the fridge. If you're keeping it for yourself, retire to the sofa with the tin and a copy of Love, Actually or another Christmas weepie. You deserve it.
Merry Christmas! x
If you fall somewhere in the middle, this post is for you. I thought I was an organised person, but then last week I was struck down by an evil virus (I'll spare you the details) that made juggling parenting, work and the onset of Christmas near impossible. If it wasn't for the miracle of online shopping and the fact that we are not hosting a Christmas feast (though I am cooking most of it), I think I would have cancelled the whole thing.
Now mostly recovered - and most importantly, with a mostly recovered child and a husband who is being force-fed vitamin tablets so he doesn't succumb to whatever we had - I am actually looking forward to The Big Day. Sure, I have to cook a turkey and a chocolate roulade and a panettone and introduce some salads to a family who looks suspiciously at any vegetable that isn't a deep-fried potato, but that's all doable. Even more doable is this incredibly easy fudge, which doesn't require any boiling or beating and can be made in an instant. If you are leaving all your Christmas shopping until the lastest of last minutes, don't put yourself through it. Just make a double batch of this stuff and you'll be regarded as a bona fide Christmas miracle.
Chocolate Almond Fudge
This recipe came to me from Tiny Happy, a blog so beautiful and serene that setting aside five minutes to read it is like giving yourself a little Christmas present every day. You can see Melissa's most recent post about the fudge here. Here's how I made it - with my time-honoured trick of using the oven as a chocolate melting device, because everyone's oven is on at this time of year, isn't it?
400g good quality dark chocolate (eg 200g Whittaker's 50 per cent and 200g Whittaker's 72 per cent chocolate, broken into pieces
1 400g tin of condensed milk
150g roasted salted almonds (or other nuts of your choice, or tangy dried fruit)
Melt the chocolate and condensed milk together - my favourite way to do this is to put it in a large heatproof bowl in a low oven (about 150C) for about 10 minutes. You could also do this in a double-boiler, or in a microwave, but the oven method is low stress and energy-efficient (if the oven has been on for something else, obviously). While this is happening, line a brownie pan or similar (about 30 x 20cm) with baking paper. Scatter half the nuts on the bottom of the tin.
As soon as the chocolate has melted, or nearly melted, take it out of the oven/double boiler and stir well until it's well mixed. Pour this mixture into the prepared tin and press the remaining nuts on top.
Put it in the fridge to set - this will happen very quickly - then slice into small squares or bars. If you're giving it away, make sure to tell the recipients to store it in the fridge. If you're keeping it for yourself, retire to the sofa with the tin and a copy of Love, Actually or another Christmas weepie. You deserve it.
Merry Christmas! x
Labels:
Breakfast,
Chocolate,
Christmas,
Gluten-free,
Guilty Pleasures,
Party,
Recipes,
Summer
Posted by
Unknown
at
17:33
13 comments:
Saturday, November 30, 2013
Treat me: Boozy figs
If you were beamed to earth from another planet at the moment you'd think all humans did was eat, drink and be merry. While the period between mid-November and early January is fairly intense on that scale, it's pretty much always the season of entertaining at our house. And I love it, I really do, except for perhaps that tense 15 minutes just before the entertainees arrive and I feel in a state of complete chaos.
This year, with two fairly major entertaining events scheduled chez nous in the next fortnight, I've decided to take control. Firstly, I'm going to delegate a lot more (sorry, invitees, I understand if you want to pull out now) and secondly, I'm going to have something up my sleeve that I prepared earlier.
These boozy figs are an excellent do-ahead option at this time of year, whether you're holding a soiree or you've been invited to one by someone like me who wants you to cross town with dessert in your handbag. The recipe is of unknown provenance - it's out of one of my mum's notebooks - and it is very simple. I've a hunch it is just the thing for this month's Tea Time Treats challenge, hosted by the ever-lovely Karen of Lavender and Lovage (with able support from Kate at What Kate Baked) - in which dried fruit is the theme.
Boozy figs
You can whip these mulled figs together in five minutes before you go to work, then when you come home they'll be all plump and juicy. If you're in the northern hemisphere, serve them warm over a slab of posh vanilla ice cream., if you're in the southern, add strawberries. If you're really, really organised, put them in a lidded jar in the fridge and they'll be good for several weeks.
400g dried figs, cut in half (use scissors)
500ml fruity red wine
3/4 cup brown sugar
1 small orange, washed and halved
1/2 tsp cinnamon
1/4 tsp ground cloves
1 punnet of strawberries, washed and hulled (optional)
Put all ingredients in a small saucepan and set over medium heat. Bring to a gentle simmer and let bubble away for five minutes. Take off the heat and let cool. Then, either transfer to a bowl or jar, cover and put in the fridge. Or, if you're planning to eat them in a few hours, add the strawberries before putting in the fridge. Serves six.
Have a great weekend, everyone!
This year, with two fairly major entertaining events scheduled chez nous in the next fortnight, I've decided to take control. Firstly, I'm going to delegate a lot more (sorry, invitees, I understand if you want to pull out now) and secondly, I'm going to have something up my sleeve that I prepared earlier.
These boozy figs are an excellent do-ahead option at this time of year, whether you're holding a soiree or you've been invited to one by someone like me who wants you to cross town with dessert in your handbag. The recipe is of unknown provenance - it's out of one of my mum's notebooks - and it is very simple. I've a hunch it is just the thing for this month's Tea Time Treats challenge, hosted by the ever-lovely Karen of Lavender and Lovage (with able support from Kate at What Kate Baked) - in which dried fruit is the theme.
Boozy figs
You can whip these mulled figs together in five minutes before you go to work, then when you come home they'll be all plump and juicy. If you're in the northern hemisphere, serve them warm over a slab of posh vanilla ice cream., if you're in the southern, add strawberries. If you're really, really organised, put them in a lidded jar in the fridge and they'll be good for several weeks.
400g dried figs, cut in half (use scissors)
500ml fruity red wine
3/4 cup brown sugar
1 small orange, washed and halved
1/2 tsp cinnamon
1/4 tsp ground cloves
1 punnet of strawberries, washed and hulled (optional)
Put all ingredients in a small saucepan and set over medium heat. Bring to a gentle simmer and let bubble away for five minutes. Take off the heat and let cool. Then, either transfer to a bowl or jar, cover and put in the fridge. Or, if you're planning to eat them in a few hours, add the strawberries before putting in the fridge. Serves six.
Have a great weekend, everyone!
Friday, September 13, 2013
Treat me: Chocolate Mousse Cake
Our fridge, not to mention our bellies, are still recovering from an epic feast we had last weekend - dinner for six adults and as many children involving a three-kilo piece of pork shoulder, sacks of Turkish buns, a crunchy slaw made from a Savoy cabbage and several fennel bulbs and a vat of homemade barbecue sauce. Amazingly there were still lots of delicious leftovers, which is why I haven't posted any recipes this week. There was even a bit of the show-stopping pudding left over, which I hid at the back of the fridge as a cook's perk.
I dreamed this dessert up to celebrate the third birthday of We Should Cocoa - which this month has the thrilling theme of 'Showstopping Cakes'. This one was such a showstopper that I couldn't waste any time photographing it, which explains the slightly odd shot below.
Chocolate Mousse Cake
Take a look at the ingredients for this showstopper and you'd be right in thinking that it's more like a heartstopper - with nearly a litre of cream involved it's not going to win any Heart Foundation prizes. But it serves at least eight, with a generous slice left over for the cook to hide in the fridge to eat later. There are three stages, but none of them are particularly onerous. You must, however, make the pavlova the day (or night) before you want to serve the cake and allow at least four hours' resting time in the fridge once you have assembled it. Don't be put off by the length of the recipe - it's not at all tricky to do.
For the pavlova base:
2 1/2 cups (560g) caster sugar
6 egg whites
3 Tbsp cocoa
For the mousse:
200g dark chocolate (at least 60 % cocoa solids), roughly chopped
400ml cream. split into 2 x 200ml measures
For the topping:
500ml cream
50g dark chocolate, roughly chopped
50g almonds, roughly chopped (optional)
First, make the pavlova. Heat the oven to 180C and line a tray with baking paper. Put a 28cm cake tin on the baking paper and draw a circle around it - this will help be a guide for the pavlova.
Using a freestanding mixer or a very powerful electric beater, whisk the egg whites until frothy, then gradually whisk in the sugar. Beat for 15 minutes, or until the sugar has dissolved. The mixture will be very thick and glossy. Sift over the cocoa and fold in, then dollop the mixture onto the prepared cake tin. Carefully put the tray into the oven, then bake at 180C for 10 minutes. Turn the heat down to 90C and leave the pavlova in the oven for 10 hours, until very dry and hard. Turn off the heat and let the pavlova cool completely in the oven.
When you are ready to start assembling the cake, get the mousse ready. To do this, heat 200ml of the cream in a medium saucepan until boiling point. Remove from heat and tip in the chocolate. Let it sit for a minute, then stir well until the chocolate melts and the mixture is smooth and glossy. Set aside to cool briefly while you whip the other 200ml of cream until it forms soft peaks. Gently fold the chocolate mixture into the cream and set aside.
Next, line the bottom and sides of the aforementioned 28cm springform cake tin with plastic wrap. Cut out a circle of the pavlova to fit into the tin. If your pavlova is very tall, slice it horizontally through the middle so you have two discs. Line the bottom of the tin with one of the discs of pavlova (or pack the bottom of the tin with the remaining pieces). Pour over the chocolate mousse, then top with the other disc or pieces of pavlova. Loosely cover with plastic wrap and put in the fridge.
Take a breather for a moment, then whip the 500ml cream to soft peaks. Remove the tin from the fridge and dollop the cream on top of the mousse and cream layers. Scatter with the roughly chopped chocolate and nuts. You can also crumble any remaining pavlova bits on top. Cover loosely with plastic and leave in the fridge for at least four hours to allow the mousse to set and the cream to soak into the crispy meringue.
To serve, carefully unclip the tin and peel away the plastic wrap before transferring the cake to a suitably glamorous dish. Serves 8-10.
Have a great weekend, everyone!
I dreamed this dessert up to celebrate the third birthday of We Should Cocoa - which this month has the thrilling theme of 'Showstopping Cakes'. This one was such a showstopper that I couldn't waste any time photographing it, which explains the slightly odd shot below.
Chocolate Mousse Cake
Take a look at the ingredients for this showstopper and you'd be right in thinking that it's more like a heartstopper - with nearly a litre of cream involved it's not going to win any Heart Foundation prizes. But it serves at least eight, with a generous slice left over for the cook to hide in the fridge to eat later. There are three stages, but none of them are particularly onerous. You must, however, make the pavlova the day (or night) before you want to serve the cake and allow at least four hours' resting time in the fridge once you have assembled it. Don't be put off by the length of the recipe - it's not at all tricky to do.
For the pavlova base:
2 1/2 cups (560g) caster sugar
6 egg whites
3 Tbsp cocoa
For the mousse:
200g dark chocolate (at least 60 % cocoa solids), roughly chopped
400ml cream. split into 2 x 200ml measures
For the topping:
500ml cream
50g dark chocolate, roughly chopped
50g almonds, roughly chopped (optional)
First, make the pavlova. Heat the oven to 180C and line a tray with baking paper. Put a 28cm cake tin on the baking paper and draw a circle around it - this will help be a guide for the pavlova.
Using a freestanding mixer or a very powerful electric beater, whisk the egg whites until frothy, then gradually whisk in the sugar. Beat for 15 minutes, or until the sugar has dissolved. The mixture will be very thick and glossy. Sift over the cocoa and fold in, then dollop the mixture onto the prepared cake tin. Carefully put the tray into the oven, then bake at 180C for 10 minutes. Turn the heat down to 90C and leave the pavlova in the oven for 10 hours, until very dry and hard. Turn off the heat and let the pavlova cool completely in the oven.
When you are ready to start assembling the cake, get the mousse ready. To do this, heat 200ml of the cream in a medium saucepan until boiling point. Remove from heat and tip in the chocolate. Let it sit for a minute, then stir well until the chocolate melts and the mixture is smooth and glossy. Set aside to cool briefly while you whip the other 200ml of cream until it forms soft peaks. Gently fold the chocolate mixture into the cream and set aside.
Next, line the bottom and sides of the aforementioned 28cm springform cake tin with plastic wrap. Cut out a circle of the pavlova to fit into the tin. If your pavlova is very tall, slice it horizontally through the middle so you have two discs. Line the bottom of the tin with one of the discs of pavlova (or pack the bottom of the tin with the remaining pieces). Pour over the chocolate mousse, then top with the other disc or pieces of pavlova. Loosely cover with plastic wrap and put in the fridge.
Take a breather for a moment, then whip the 500ml cream to soft peaks. Remove the tin from the fridge and dollop the cream on top of the mousse and cream layers. Scatter with the roughly chopped chocolate and nuts. You can also crumble any remaining pavlova bits on top. Cover loosely with plastic and leave in the fridge for at least four hours to allow the mousse to set and the cream to soak into the crispy meringue.
To serve, carefully unclip the tin and peel away the plastic wrap before transferring the cake to a suitably glamorous dish. Serves 8-10.
Have a great weekend, everyone!
Labels:
Baking,
Cake,
Chocolate,
Gluten-free,
Party,
Pudding,
Sweet Sweet Friday,
Treats,
We Should Cocoa
Posted by
Unknown
at
07:43
8 comments:
Friday, May 24, 2013
Treat me: Overnight cupcakes
Last week, when I issued a desperate call out for birthday party food ideas, I was inspired by many of the responses. But my favourite by far was the suggestion by Janice of Farmersgirl Kitchen that I make her vanilla cupcakes.
Now, I know cupcakes are, like, soooo 2009 and eclairs are where it's at in 2013, but I can assure you that for small children, little cakes with big amounts of icing will always be in vogue.
The other thing that intrigued me about this particular recipe is that it requires the batter to rest in the fridge overnight. Among other things, this means you can have freshly baked cupcakes for breakfast, which is a trend worth setting.
Overnight cupcakes
Janice originally used a recipe from Le Cookie, a book by French pastry whizzes Mickael Benichou and Benoit Castel, who set up luxury cookie brand Moon St. So this cupcake recipe, by a French chef who designs recipes for a bakery in New York, came to me from a Scottish food blogger. Don't you love the internet? Here's the New Zealand version. Just a note - the icing sugar in the cupcake batter is not a mistake. I've made them with caster sugar and icing sugar and the icing sugar version is definitely superior.
3 eggs
150g icing sugar
finely grated zest of two lemons
150g white spelt (or plain white) flour
1 tsp baking powder
150g butter, melted and cooled
Put the eggs, icing sugar and lemon zest into the bowl of a freestanding mixer and beat on high for five minutes, until the mixture is pale and very fluffy. Sift over the flour and baking powder and mix in on low speed for a minute or two. Fold in the melted butter.
Cover the bowl and leave overnight - or for at least eight hours - in the fridge.
The next day, heat the oven to 160C and put cupcake cases in a 12-hole muffin pan. Divide the mixture evenly between the cases, smooth the tops gently, and bake for about 15 minutes until risen and pale gold. Let sit in the tin for five minutes, then remove the cupcakes to a rack to cool completely.
When they are cold, ice as you see fit. The ones pictured above have swirls of raspberry buttercream - recipe follows.
Raspberry Buttercream Icing
This generously tops 12 cupcakes. Go ahead and use raspberry flavouring/pink food colouring if you like - I was just experimenting with ways to avoid it ahead of tomorrow's birthday party mayhem. Leaving out the sugar would probably be a safer bet! Using a freestanding mixer is the easiest way to do this and gets the best results, though a food processor comes a close second.
150g very soft but NOT melted butter
300g icing sugar, sifted
6 raspberries (frozen is fine)
2 Tbsp boiling water
Put the butter and icing sugar in a freestanding mixer/food processor and beat on high speed until very pale and fluffy. Set the mixer going, make yourself a cup of tea and sit down for five minutes (getting up occasionally to scrape down the sides of the bowl). Crush the raspberries in a cup and add the boiling water. Keep the mixer going and drizzle in the raspberry mixture, about a teaspoon at a time, until the icing is very fluffy and light.
Have a great weekend, everyone. Tomorrow our house will be filled with the sound of a dozen children, at least a dozen adults, and popping balloons. I am going to spend Sunday in a darkened room with a cold cloth on my forehead. At least, that's what I'm planning!
Now, I know cupcakes are, like, soooo 2009 and eclairs are where it's at in 2013, but I can assure you that for small children, little cakes with big amounts of icing will always be in vogue.
The other thing that intrigued me about this particular recipe is that it requires the batter to rest in the fridge overnight. Among other things, this means you can have freshly baked cupcakes for breakfast, which is a trend worth setting.
Overnight cupcakes
Janice originally used a recipe from Le Cookie, a book by French pastry whizzes Mickael Benichou and Benoit Castel, who set up luxury cookie brand Moon St. So this cupcake recipe, by a French chef who designs recipes for a bakery in New York, came to me from a Scottish food blogger. Don't you love the internet? Here's the New Zealand version. Just a note - the icing sugar in the cupcake batter is not a mistake. I've made them with caster sugar and icing sugar and the icing sugar version is definitely superior.
3 eggs
150g icing sugar
finely grated zest of two lemons
150g white spelt (or plain white) flour
1 tsp baking powder
150g butter, melted and cooled
Put the eggs, icing sugar and lemon zest into the bowl of a freestanding mixer and beat on high for five minutes, until the mixture is pale and very fluffy. Sift over the flour and baking powder and mix in on low speed for a minute or two. Fold in the melted butter.
Cover the bowl and leave overnight - or for at least eight hours - in the fridge.
The next day, heat the oven to 160C and put cupcake cases in a 12-hole muffin pan. Divide the mixture evenly between the cases, smooth the tops gently, and bake for about 15 minutes until risen and pale gold. Let sit in the tin for five minutes, then remove the cupcakes to a rack to cool completely.
When they are cold, ice as you see fit. The ones pictured above have swirls of raspberry buttercream - recipe follows.
Raspberry Buttercream Icing
This generously tops 12 cupcakes. Go ahead and use raspberry flavouring/pink food colouring if you like - I was just experimenting with ways to avoid it ahead of tomorrow's birthday party mayhem. Leaving out the sugar would probably be a safer bet! Using a freestanding mixer is the easiest way to do this and gets the best results, though a food processor comes a close second.
150g very soft but NOT melted butter
300g icing sugar, sifted
6 raspberries (frozen is fine)
2 Tbsp boiling water
Put the butter and icing sugar in a freestanding mixer/food processor and beat on high speed until very pale and fluffy. Set the mixer going, make yourself a cup of tea and sit down for five minutes (getting up occasionally to scrape down the sides of the bowl). Crush the raspberries in a cup and add the boiling water. Keep the mixer going and drizzle in the raspberry mixture, about a teaspoon at a time, until the icing is very fluffy and light.
Have a great weekend, everyone. Tomorrow our house will be filled with the sound of a dozen children, at least a dozen adults, and popping balloons. I am going to spend Sunday in a darkened room with a cold cloth on my forehead. At least, that's what I'm planning!
Monday, May 13, 2013
Party planning 4.0
There is a major event in our lives in a fortnight's time and I need your help. The Small Girl is turning four (four! how did that happen?) and The Party is the subject of much discussion.
Previously, we've used her birthday as an excuse to entertain our friends - and in some cases, their children. This time it's all about her friends - and their parents, some of whom are unknown quantities. Needless to say, I am nervous.
In part, this is for the obvious reason that inviting a dozen small children to rampage through the house on a Saturday morning is hardly conducive to a relaxing time of it. We've been to so many parties recently - most involving bouncy castles and pirates and pass-the-parcel where every child gets a fancy gift - that I feel expectations are getting higher by the minute.
Then there's the food. Some people have separate food for the children and adults, some have a free-for-all. There is always a cake of extreme proportions - sometimes outsourced, sometimes lovingly created (and probably sworn over) by the adoring parents.
We seem to have settled on the cake - but then the other requests are coming thick and fast. She pores over the picture of the 'Welcome Table' groaning with a clove-studded ham, star biscuits and various other delights in Nigella Christmas and says, 'can we have that when it's my birthday please?' Don't even start me on the supermarket, where her eyes light up as we march at speed through aisles of rubbish. "We could have those biscuits/marshmallows/fizzy drinks at my party, couldn't we?"
While there will be no bouncy castle at our party, nor any vile Cheerios (honestly, I can't believe people still feed those to their children!), we are going to have fun things to eat. The question is, what?
What would you feed a dozen children and probably at least as many adults on a Saturday morning? And do you have a great cake/cupcake recipe that can be made a couple of days in advance?
Monday, April 15, 2013
Smoked salmon and wasabi pate
The man of the house is currently brushing up on his French skills and this means getting me to help him with his homework. Once upon a time, this would have been easy, but the passing of time means my brain doesn't operate in French as well as it used to (or, indeed, as I imagined it once did). I've been feeling quite depressed about this, but am consoling myself with the fact that my menu French is still better than his. And when I looked up the Larousse to get a proper dictionary definition of 'pate', I didn't need another dictionary to explain the answer. So I can't be too badly off, can I?
Smoked salmon and wasabi pate
For the record, Larousse defines 'pate' as 'preparation de charcuterie de texture tres variable et composee de viandes et d'abats en morceaux ou en pate fine et de differents ingredients' and you don't need to know much French to figure out that there are (mercifully) no 'viandes' (or 'abats' - organs) in a smoked salmon version. But I had to call it something other than 'a sort of spread-y thing you can have on toast or crackers or on little bits of cucumber like an 80s canape', didn't I?
This is inspired by something in Jamie Oliver's book on British food - he makes something similar with smoked trout and horseradish and serves it with baby Yorkshire puddings. And cor blimey, guv'nor, it is bloomin' lovely. Or c'est absolument delicieux, as our French friends would say.
150g cream cheese, softened
1/4 - 1 tsp wasabi paste
150g hot smoked salmon
finely grated zest of a lemon, plus its juice
a couple of teaspoons of finely chopped dill or mint
Put the cream cheese, lemon zest and 1/4 teaspoon of wasabi in a small bowl and beat with a fork until smooth. Taste it for hotness - the wasabi should be present, but not overpowering. Keep adding it until you think it's about right. Flake in the hot smoked salmon and dill or mint. Fold it into the cream cheese, adding a little lemon juice if it seems a bit stiff. Taste again for seasoning - add some salt and freshly cracked black pepper until the balance is right. Scrape into a little bowl and cover, then store in the fridge. Makes enough for six people as a canape, with enough for one lucky person to have on toast the next morning.
Bonne semaine, tout le monde!
For the record, Larousse defines 'pate' as 'preparation de charcuterie de texture tres variable et composee de viandes et d'abats en morceaux ou en pate fine et de differents ingredients' and you don't need to know much French to figure out that there are (mercifully) no 'viandes' (or 'abats' - organs) in a smoked salmon version. But I had to call it something other than 'a sort of spread-y thing you can have on toast or crackers or on little bits of cucumber like an 80s canape', didn't I?
This is inspired by something in Jamie Oliver's book on British food - he makes something similar with smoked trout and horseradish and serves it with baby Yorkshire puddings. And cor blimey, guv'nor, it is bloomin' lovely. Or c'est absolument delicieux, as our French friends would say.
150g cream cheese, softened
1/4 - 1 tsp wasabi paste
150g hot smoked salmon
finely grated zest of a lemon, plus its juice
a couple of teaspoons of finely chopped dill or mint
Put the cream cheese, lemon zest and 1/4 teaspoon of wasabi in a small bowl and beat with a fork until smooth. Taste it for hotness - the wasabi should be present, but not overpowering. Keep adding it until you think it's about right. Flake in the hot smoked salmon and dill or mint. Fold it into the cream cheese, adding a little lemon juice if it seems a bit stiff. Taste again for seasoning - add some salt and freshly cracked black pepper until the balance is right. Scrape into a little bowl and cover, then store in the fridge. Makes enough for six people as a canape, with enough for one lucky person to have on toast the next morning.
Bonne semaine, tout le monde!
Labels:
Canapes,
Cheese,
Condiments,
Drinks,
Fish,
Gluten-free,
Party,
Recipes,
What's for dinner?
Posted by
Unknown
at
06:43
4 comments:
Tuesday, April 09, 2013
The perfect chicken sandwich
Quite apart from the hijinks of Fashion Week (hey, it wasn't exactly Milan, but you have to take your excitement where you find it in this life), we seem to be on the party circuit at the moment. These are the sorts of parties that involve fairy bread, sausage rolls, cake smothered in pink icing and at least one participant in tears before last orders.
Since we have a birthday party of our own coming up in May, I'm beginning to get quite nervous. It was bad enough last month, trying to keep up with the play when my father-in-law had a bash to mark a significant birthday. I rashly volunteered to make sandwiches, then had to talk my mother-in-law out of them being complicated club affairs involving several fillings and an anxious amount of cutting. "Let's just have classic chicken and tarragon," I said airily, before remembering I was in a place where tarragon was harder to come by than gold bars. Instead, I whipped up what I thought was the perfect chicken sandwich while small children ran amok in the kitchen and old ladies waged war in the living room. Here's how I did it.
The perfect chicken sandwich
This isn't so much a recipe as a set of general guidelines. To me, a good sandwich has different textures, balanced flavours and good bread.
The cornerstone of these chicken sandwiches is a good mayonnaise - and by that I'm afraid I mean a real one. Trust me, making mayonnaise is easy and much faster than a trip to the shop to buy a jar of Best Foods' finest. The other trick to good sandwich making, especially for a party situation, is preparation. Get everything ready and set yourself up like a miniature sandwich bar. It'll be a good skill to have when the revolution comes.
1 batch of homemade mayonnaise, to which you have added 2 Tbsp wholegrain mustard
four handfuls of spinach, finely shredded
1 large cooked chicken breast (poached or roasted), cut into 1cm dice
3/4 cup slivered almonds, toasted and cooled
1 cup green grapes, halved
salt and pepper
12 slices from a loaf of bread - light rye is good
Put the diced chicken breast in a small bowl and fold through 3-4 tablespoons of mayonnaise. It should be lightly coated rather than drowning in the stuff. Toss through the spinach. Season with salt and pepper to taste.
Lay six slices of bread on a clean worksurface and spread with mayonnaise. Grind over some black pepper. Cover each with the chicken and spinach mixture, then scatter over the grapes and almonds.
Spread the remaining six slices of bread with mayonnaise and put on top of each sandwich. Press down lightly, then trim off the crusts. Cut each sandwich into elegant fingers and arrange on a plate. Cover with a damp cloth if not serving immediately.
What do you put in your chicken sandwiches?
Since we have a birthday party of our own coming up in May, I'm beginning to get quite nervous. It was bad enough last month, trying to keep up with the play when my father-in-law had a bash to mark a significant birthday. I rashly volunteered to make sandwiches, then had to talk my mother-in-law out of them being complicated club affairs involving several fillings and an anxious amount of cutting. "Let's just have classic chicken and tarragon," I said airily, before remembering I was in a place where tarragon was harder to come by than gold bars. Instead, I whipped up what I thought was the perfect chicken sandwich while small children ran amok in the kitchen and old ladies waged war in the living room. Here's how I did it.
The perfect chicken sandwich
This isn't so much a recipe as a set of general guidelines. To me, a good sandwich has different textures, balanced flavours and good bread.
The cornerstone of these chicken sandwiches is a good mayonnaise - and by that I'm afraid I mean a real one. Trust me, making mayonnaise is easy and much faster than a trip to the shop to buy a jar of Best Foods' finest. The other trick to good sandwich making, especially for a party situation, is preparation. Get everything ready and set yourself up like a miniature sandwich bar. It'll be a good skill to have when the revolution comes.
1 batch of homemade mayonnaise, to which you have added 2 Tbsp wholegrain mustard
four handfuls of spinach, finely shredded
1 large cooked chicken breast (poached or roasted), cut into 1cm dice
3/4 cup slivered almonds, toasted and cooled
1 cup green grapes, halved
salt and pepper
12 slices from a loaf of bread - light rye is good
Put the diced chicken breast in a small bowl and fold through 3-4 tablespoons of mayonnaise. It should be lightly coated rather than drowning in the stuff. Toss through the spinach. Season with salt and pepper to taste.
Lay six slices of bread on a clean worksurface and spread with mayonnaise. Grind over some black pepper. Cover each with the chicken and spinach mixture, then scatter over the grapes and almonds.
Spread the remaining six slices of bread with mayonnaise and put on top of each sandwich. Press down lightly, then trim off the crusts. Cut each sandwich into elegant fingers and arrange on a plate. Cover with a damp cloth if not serving immediately.
What do you put in your chicken sandwiches?
Labels:
Bread,
Canapes,
Chicken,
DIY,
Party,
Recipes,
Storecupboard secrets
Posted by
Unknown
at
07:11
2 comments:
Friday, February 22, 2013
Treat me: Chocolate ginger lychees
When I was about 11 or 12 one of my favourite cookbooks was The Australian Women's Weekly Chinese Cooking Cookbook. I don't ever remember my mother cooking anything out of it, but we did eat out at Chinese restaurants and I based my whole understanding of the menu at Chopsticks and Hoo Wah on what was on offer in that book.
It was probably quite sophisticated for the time and it had all the information I craved on how to make curly spring onions and deep-fried ice-cream balls. None of which I can remember now, of course, but one image from the book has stayed with me. The star of the dessert section, apart from the aforementioned deep-fried ice-cream, was the chocolate-dipped lychees. Some 25 years later, I have finally made them. And boy, were they worth the wait.
Chocolate ginger lychees
These couldn't be simpler - or more delicious. The only thing you need to be careful about is draining the lychees really well. Handle them with care - dry them with kitchen paper like you're handling a baby after a bath - and you're away. Quantities are slightly approximate because some tins of lychees contain more than others. I'm sure you won't be too stuck for ideas if you're left with lychees, ginger or chocolate left over.
As well as being the ultimate trip down memory lane for me, this recipe is also perfect for this month's We Should Cocoa challenge. The February We Should Cocoa is being hosted by Jen of Blue Kitchen Bakes, who has chosen ginger as the special guest ingredient.
1 x 450g tin lychees in light syrup
20 small nuggets of crystallised ginger
200g good quality dark chocolate, at least 60 per cent cocoa solids
Drain the lychees in a sieve, then dry carefully with kitchen paper. Leave them upside down on more kitchen paper to dry out while you melt the chocolate.
Melt the chocolate over gentle heat - in a double boiler arrangement is probably safest. Line a tray with baking paper.
Insert a piece of ginger into each lychee. Using a fork, a skewer or a dipping spoon, carefully drop each stuffed lychee into the chocolate and roll it around to coat. Remove from the chocolate and place on the lined tray. Repeat until all the lychees are coated.
Put the dipped lychees in the fridge to set firm, then transfer to a lidded container. Store in the fridge. They're also good straight from the freezer - it's like having a chocolate-ginger-lychee sorbet. Makes about 18.
Have a great weekend, everyone x
It was probably quite sophisticated for the time and it had all the information I craved on how to make curly spring onions and deep-fried ice-cream balls. None of which I can remember now, of course, but one image from the book has stayed with me. The star of the dessert section, apart from the aforementioned deep-fried ice-cream, was the chocolate-dipped lychees. Some 25 years later, I have finally made them. And boy, were they worth the wait.
Chocolate ginger lychees
These couldn't be simpler - or more delicious. The only thing you need to be careful about is draining the lychees really well. Handle them with care - dry them with kitchen paper like you're handling a baby after a bath - and you're away. Quantities are slightly approximate because some tins of lychees contain more than others. I'm sure you won't be too stuck for ideas if you're left with lychees, ginger or chocolate left over.
As well as being the ultimate trip down memory lane for me, this recipe is also perfect for this month's We Should Cocoa challenge. The February We Should Cocoa is being hosted by Jen of Blue Kitchen Bakes, who has chosen ginger as the special guest ingredient.
1 x 450g tin lychees in light syrup
20 small nuggets of crystallised ginger
200g good quality dark chocolate, at least 60 per cent cocoa solids
Drain the lychees in a sieve, then dry carefully with kitchen paper. Leave them upside down on more kitchen paper to dry out while you melt the chocolate.
Melt the chocolate over gentle heat - in a double boiler arrangement is probably safest. Line a tray with baking paper.
Insert a piece of ginger into each lychee. Using a fork, a skewer or a dipping spoon, carefully drop each stuffed lychee into the chocolate and roll it around to coat. Remove from the chocolate and place on the lined tray. Repeat until all the lychees are coated.
Put the dipped lychees in the fridge to set firm, then transfer to a lidded container. Store in the fridge. They're also good straight from the freezer - it's like having a chocolate-ginger-lychee sorbet. Makes about 18.
Have a great weekend, everyone x
Labels:
Chocolate,
Gluten-free,
Party,
Pudding,
Recipes,
Summer,
Sweet Sweet Friday,
Treats,
Vegan,
We Should Cocoa
Posted by
Unknown
at
06:42
17 comments:
Thursday, February 14, 2013
Sweet hearts for your Valentine
It's not very cool to like Valentine's Day, is it? It's much more acceptable to frown on the ridiculousness of red roses, pink champagne and boxes of chocolates than to admit that you'd happily have any of them turn up at your doorstep.
Speaking as someone who once received a plastic rose for Valentine's Day, I have a foot in both camps. Yes, I believe romantic gestures - however you define them - shouldn't be limited to one day a year, but I don't think that means you should be all Grinch-y about it. Embrace the chance to do something pink and heart-shaped for once. You can always be boring and unromantic tomorrow.
Love Biscuits
The Small Girl and I made these this morning. The recipe is a more straightforward version of Nigella's one in How To Eat.We were going to turn them into bunting for when our beloved comes home, but we've eaten too many and the holes I made got a bit sticky with icing. Nevermind, love is never having to apologise for not making heart biscuits into bunting.
300g plain flour
1 tsp baking powder
1 tsp cinnamon
1 tsp ground ginger
pinch of salt
100g butter, diced
100g soft brown sugar
5 Tbsp golden syrup
1 egg
Heat the oven to 160C and line a tray with baking paper.
Sift the flour, spices, baking powder and salt into a bowl. Rub in the butter (you can do this in a freestanding mixer), then add the sugar. Mix the egg and golden syrup together, then add. Mix with your hands to make a firm dough.
Split it into two discs, wrap one well in clingfilm and put it in the fridge (or wrap it really well and put it in the freezer for up to a month). Roll the other one out between two sheets of clingfilm until it is about 3mm thick and cut out shapes with biscuit cutters.
Place these on the prepared tray and bake for about 12 minutes. Remove to a rack to cool.
When they are cold, ice with glace icing made by mixing 150g icing sugar with 2 Tbsp boiling water and as much food colouring as you can stand. If you fancy something a little harder, check out our MAC makeup-inspired heart below.
May you have a very happy Valentine's Day and be feted by admirers both well-known and secret,
Lucy x
Speaking as someone who once received a plastic rose for Valentine's Day, I have a foot in both camps. Yes, I believe romantic gestures - however you define them - shouldn't be limited to one day a year, but I don't think that means you should be all Grinch-y about it. Embrace the chance to do something pink and heart-shaped for once. You can always be boring and unromantic tomorrow.
Love Biscuits
The Small Girl and I made these this morning. The recipe is a more straightforward version of Nigella's one in How To Eat.We were going to turn them into bunting for when our beloved comes home, but we've eaten too many and the holes I made got a bit sticky with icing. Nevermind, love is never having to apologise for not making heart biscuits into bunting.
300g plain flour
1 tsp baking powder
1 tsp cinnamon
1 tsp ground ginger
pinch of salt
100g butter, diced
100g soft brown sugar
5 Tbsp golden syrup
1 egg
Heat the oven to 160C and line a tray with baking paper.
Sift the flour, spices, baking powder and salt into a bowl. Rub in the butter (you can do this in a freestanding mixer), then add the sugar. Mix the egg and golden syrup together, then add. Mix with your hands to make a firm dough.
Split it into two discs, wrap one well in clingfilm and put it in the fridge (or wrap it really well and put it in the freezer for up to a month). Roll the other one out between two sheets of clingfilm until it is about 3mm thick and cut out shapes with biscuit cutters.
Place these on the prepared tray and bake for about 12 minutes. Remove to a rack to cool.
When they are cold, ice with glace icing made by mixing 150g icing sugar with 2 Tbsp boiling water and as much food colouring as you can stand. If you fancy something a little harder, check out our MAC makeup-inspired heart below.
May you have a very happy Valentine's Day and be feted by admirers both well-known and secret,
Lucy x
Subscribe to:
Posts (Atom)


.jpg)